A5 Oil Change DIY Procedure - 3.2L Engine
 08-26-2009, 12:20 PM
#1
AudiWorld Senior Member
Thread Starter

Okay, so I noticed there don’t seem to be any how-to posts for changing the oil on the 3.2 engine, so I figured I’d write one up since I just changed my oil for the first time. Even though the first service is scheduled for 5000 miles, I couldn’t convince myself to wait since it’s always been recommended to change the oil sooner on a new engine. So after 2000 miles I decided to change it. It's probably unnecessary, but it makes me feel better.
Maybe I couldn’t find a DIY post because it’s fairly simple, but in case anybody wonders about changing their oil themselves, here is a quick write-up.
Items needed: 6.5L of oil (6.87 qts.), oil filter, large adjustable wrench or channel-lock pliers, 6mm allen wrench, large flat-head screwdriver (or a coin), needle-nose pliers, funnel, drain pan, car ramps or jack stands.
Some folks have advocated the oil extractor units for removing the oil through the dipstick tube, and one day I might get one. But since I don’t have one, I changed it from underneath - the old-fashioned way.
After driving around for a short while to warm up the oil (and ensure that all contaminants are in suspension in the oil), the first step for me is to put the car on ramps. Jack stands would work also, but it’s much easier to wiggle around and remove the plastic belly pan if the front end is raised.

The belly pan is affixed with 11 cam-lock screws. The 8 in the front get removed and the 3 toward the back just get loosened, but they stay attached to the pan. You can use a screwdriver, but I find a nickel works great since the slot in the screws is quite wide.
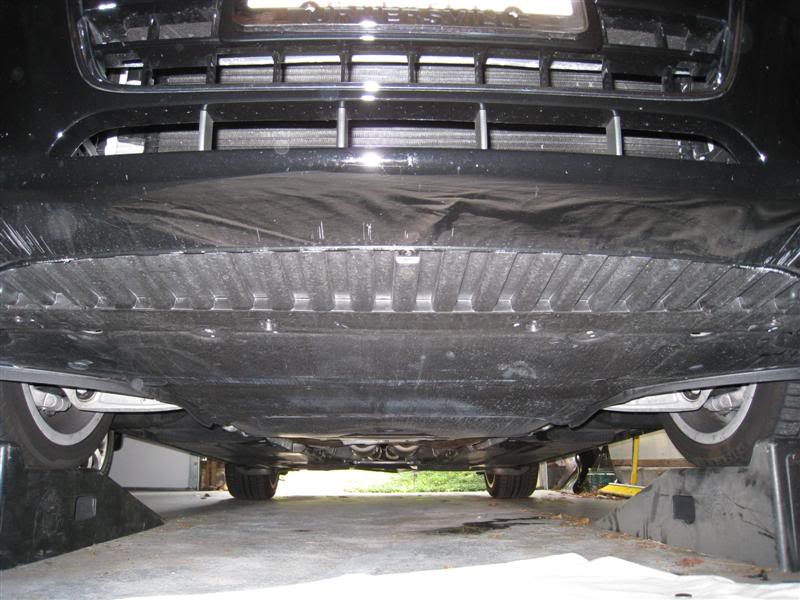
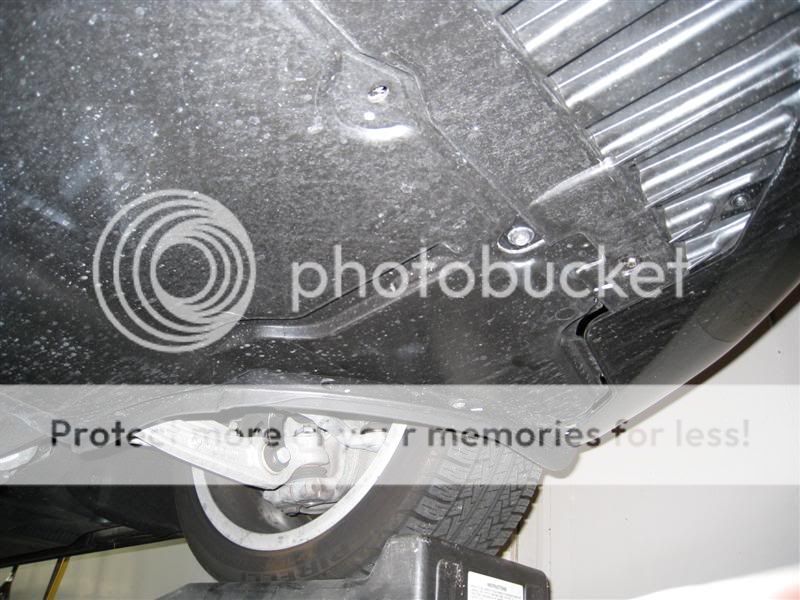
After removing the screws the pan needs to be slid back toward the rear of the car to release the tabs that tuck under the lip of the front bumper. Removal of this pan may seem like a headache, but it’s really pretty easy. Just remove the pan and set it aside.
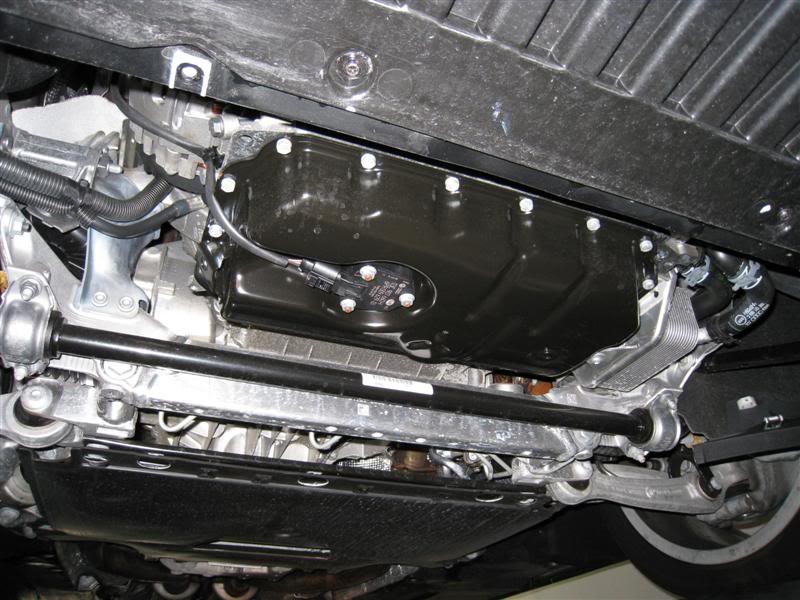
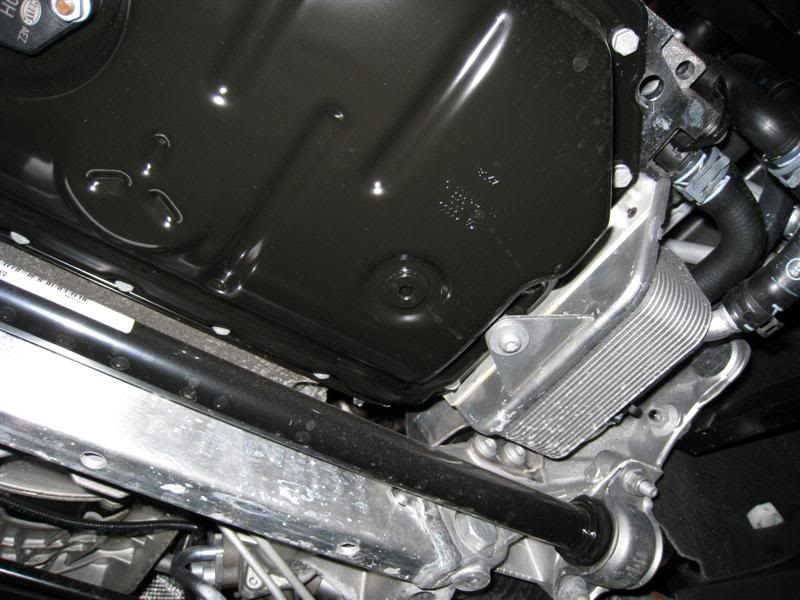
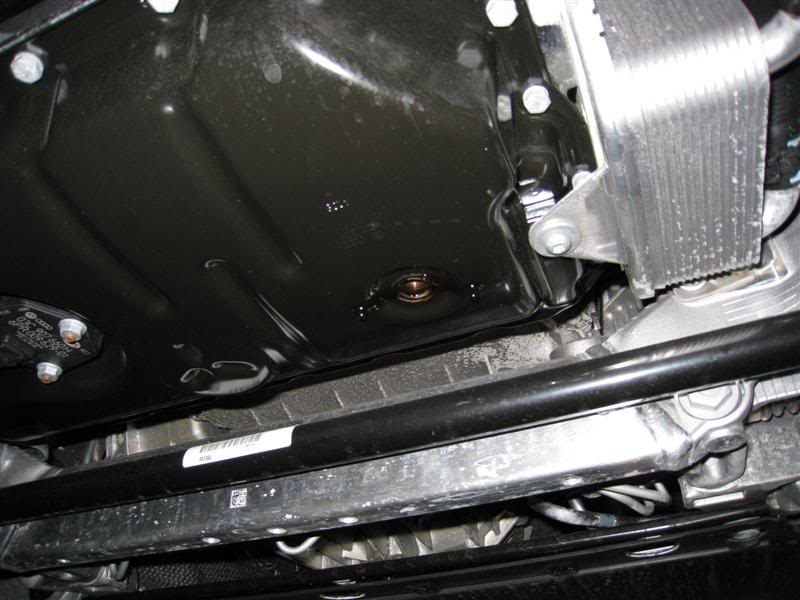
Now you need to remove the drain plug. This requires a 6mm allen wrench. You really need the metric wrench. If you try to use the closest fractional wrench (7/32") it will be too loose and will likely just round off and won’t work. Set the drain pan underneath and remove the plug. Unfortunately the plug is downward-facing, which means you have to be careful turning the wrench to let the oil drip into the pan and not run down your arm.
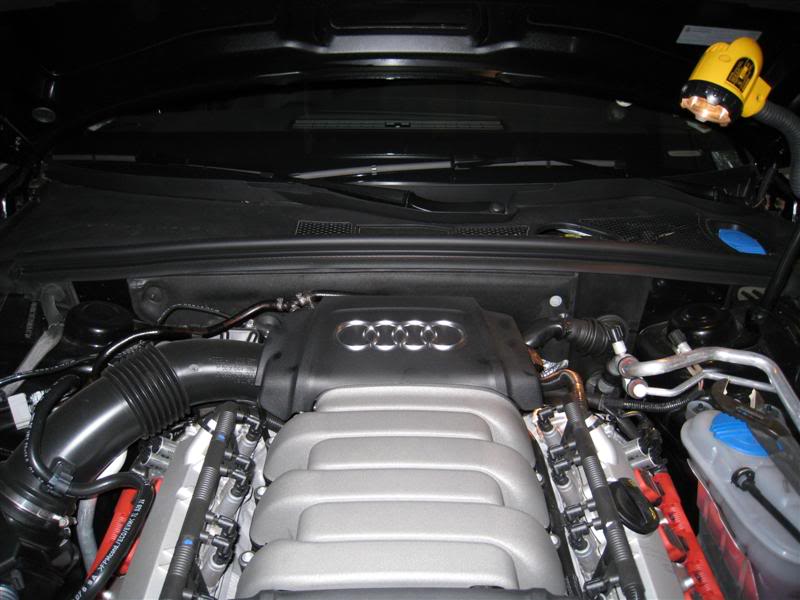
Once you remove the plug you should open the oil cap in the engine compartment to allow the oil to flow better out of the drain plug. While the oil is draining you can remove the oil filter. The filter is located on the top of the engine underneath the plastic cover with the Audi rings. This cover is just held on with 3 pressure-fit ball joints. You just need to pull up on the cover to remove it.
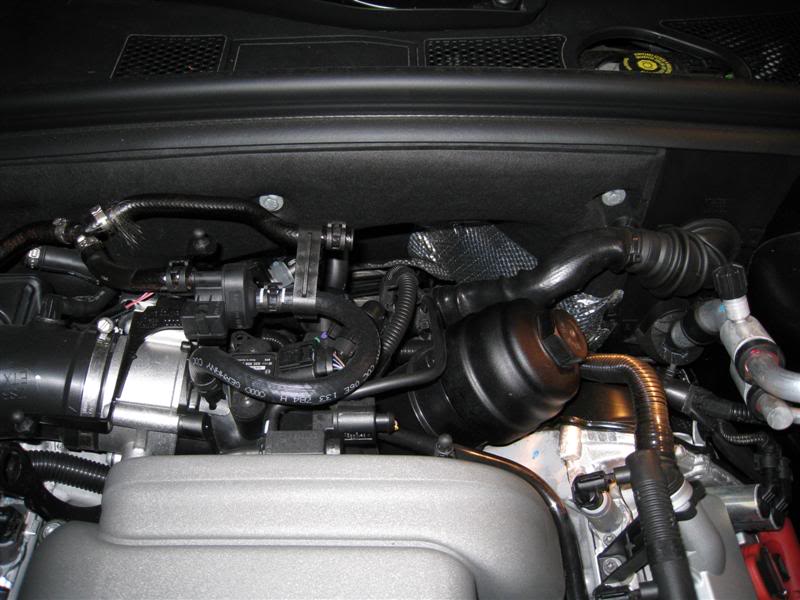
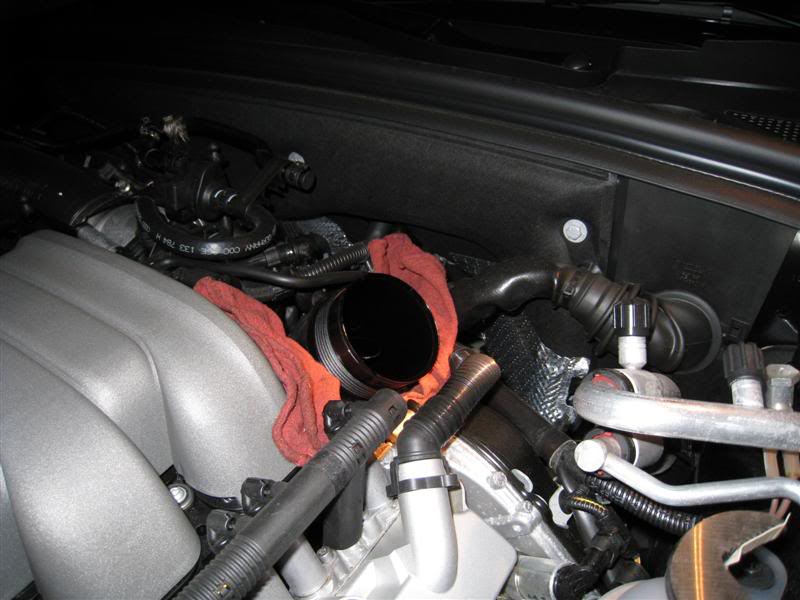
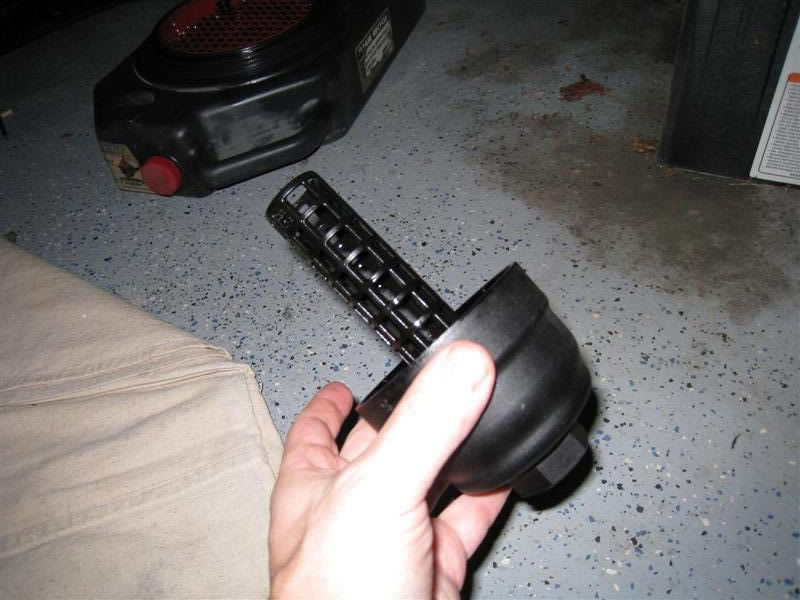
Remove the filter cover with the large adjustable-wrench or pliers. I didn’t have a big-enough wrench, so I used channel-locks. I put a bit of tape on the jaws to prevent them from marring the plastic nut. It is also helpful to put a rag under the housing in case oil drips off the filter as you are removing it. I found it worked best to partially pull out the filter and wait a few seconds while the oil dripped off it into the housing before pulling it completely out.
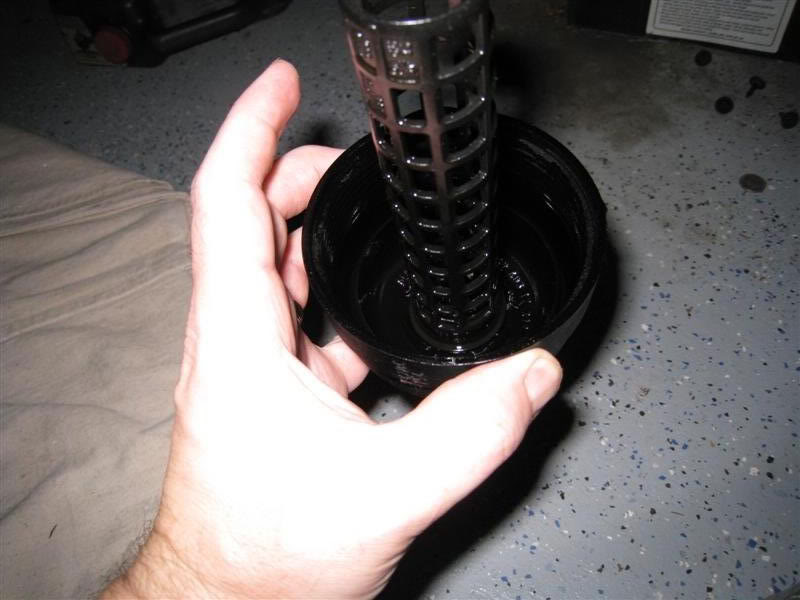
Have a plastic grocery bag or something standing by to stick the filter in once you remove it. The filter will come out of the housing still “attached” to the cover with a friction-fit. Once I had it in the plastic bag I just grabbed it from outside the bag and pulled on it to release it from the cover and plastic spindle that runs down the center core.
There is a rubber gasket/O-ring that rests down inside the filter cover that should be replaced. Replacement gaskets should have come with your filter. There is a small tab you can grab with some needle-nose pliers and it will pull right out. Lube up the new gasket with some oil and stick it down in the slot, making sure to leave the tab facing up for future removal. There is also an O-ring on the lower body of the filter housing that should be replaced. Just pull the old one off and put the new one on.
Stick the new filter onto the spindle and press it down to make sure it seats against the cover. Stick the whole assembly back into the housing on the car and screw it in place. The cover calls for the cover to be tightened to a specific torque, but I don’t have a torque wrench so I just tightened it nice and firmly. The parts are plastic, so don’t really crank on it. I just tightened it as tight as I could comfortably do with one hand, which seemed about right.
By now the oil should be pretty much done draining from below. It will still be dripping, so you could wait a while until it stops dripping, but that isn’t necessary. Clean up the drain plug and replace the deformable metal washer with a new one. This also should have come with the filter – mine came with several. Wipe off the drain hole and replace the plug. Tighten it nice and firmly with the allen wrench, making sure that it’s tight enough to compress the washer.
Now fill up the crankcase with 6.5L of oil (make sure the oil meets the required VW 502.00 specs. Now replace the oil cap and start the engine. Let it run for a bit and check for any leaks from the plug or filter housing. Once you verify everything is okay with no leaks shut off the engine. Replace the belly pan by reversing the removal procedure. Take the car off the ramps and clean everything up.
Unfortunately, without a dipstick on these engines you have to use the MMI to verify your oil level. My car took a good bit of driving before it finally registered the new level, and it turned out to be just right. But I might find myself purchasing a real dipstick down the road so I can verify the level right away.
You’re done. It looks complicated when described, but it is a pretty easy procedure that anybody can do with some very basic tools and supplies. I hope this is helpful to somebody.
Maybe I couldn’t find a DIY post because it’s fairly simple, but in case anybody wonders about changing their oil themselves, here is a quick write-up.
Items needed: 6.5L of oil (6.87 qts.), oil filter, large adjustable wrench or channel-lock pliers, 6mm allen wrench, large flat-head screwdriver (or a coin), needle-nose pliers, funnel, drain pan, car ramps or jack stands.
Some folks have advocated the oil extractor units for removing the oil through the dipstick tube, and one day I might get one. But since I don’t have one, I changed it from underneath - the old-fashioned way.
After driving around for a short while to warm up the oil (and ensure that all contaminants are in suspension in the oil), the first step for me is to put the car on ramps. Jack stands would work also, but it’s much easier to wiggle around and remove the plastic belly pan if the front end is raised.
The belly pan is affixed with 11 cam-lock screws. The 8 in the front get removed and the 3 toward the back just get loosened, but they stay attached to the pan. You can use a screwdriver, but I find a nickel works great since the slot in the screws is quite wide.
After removing the screws the pan needs to be slid back toward the rear of the car to release the tabs that tuck under the lip of the front bumper. Removal of this pan may seem like a headache, but it’s really pretty easy. Just remove the pan and set it aside.
Now you need to remove the drain plug. This requires a 6mm allen wrench. You really need the metric wrench. If you try to use the closest fractional wrench (7/32") it will be too loose and will likely just round off and won’t work. Set the drain pan underneath and remove the plug. Unfortunately the plug is downward-facing, which means you have to be careful turning the wrench to let the oil drip into the pan and not run down your arm.
Once you remove the plug you should open the oil cap in the engine compartment to allow the oil to flow better out of the drain plug. While the oil is draining you can remove the oil filter. The filter is located on the top of the engine underneath the plastic cover with the Audi rings. This cover is just held on with 3 pressure-fit ball joints. You just need to pull up on the cover to remove it.
Remove the filter cover with the large adjustable-wrench or pliers. I didn’t have a big-enough wrench, so I used channel-locks. I put a bit of tape on the jaws to prevent them from marring the plastic nut. It is also helpful to put a rag under the housing in case oil drips off the filter as you are removing it. I found it worked best to partially pull out the filter and wait a few seconds while the oil dripped off it into the housing before pulling it completely out.
Have a plastic grocery bag or something standing by to stick the filter in once you remove it. The filter will come out of the housing still “attached” to the cover with a friction-fit. Once I had it in the plastic bag I just grabbed it from outside the bag and pulled on it to release it from the cover and plastic spindle that runs down the center core.
There is a rubber gasket/O-ring that rests down inside the filter cover that should be replaced. Replacement gaskets should have come with your filter. There is a small tab you can grab with some needle-nose pliers and it will pull right out. Lube up the new gasket with some oil and stick it down in the slot, making sure to leave the tab facing up for future removal. There is also an O-ring on the lower body of the filter housing that should be replaced. Just pull the old one off and put the new one on.
Stick the new filter onto the spindle and press it down to make sure it seats against the cover. Stick the whole assembly back into the housing on the car and screw it in place. The cover calls for the cover to be tightened to a specific torque, but I don’t have a torque wrench so I just tightened it nice and firmly. The parts are plastic, so don’t really crank on it. I just tightened it as tight as I could comfortably do with one hand, which seemed about right.
By now the oil should be pretty much done draining from below. It will still be dripping, so you could wait a while until it stops dripping, but that isn’t necessary. Clean up the drain plug and replace the deformable metal washer with a new one. This also should have come with the filter – mine came with several. Wipe off the drain hole and replace the plug. Tighten it nice and firmly with the allen wrench, making sure that it’s tight enough to compress the washer.
Now fill up the crankcase with 6.5L of oil (make sure the oil meets the required VW 502.00 specs. Now replace the oil cap and start the engine. Let it run for a bit and check for any leaks from the plug or filter housing. Once you verify everything is okay with no leaks shut off the engine. Replace the belly pan by reversing the removal procedure. Take the car off the ramps and clean everything up.
Unfortunately, without a dipstick on these engines you have to use the MMI to verify your oil level. My car took a good bit of driving before it finally registered the new level, and it turned out to be just right. But I might find myself purchasing a real dipstick down the road so I can verify the level right away.
You’re done. It looks complicated when described, but it is a pretty easy procedure that anybody can do with some very basic tools and supplies. I hope this is helpful to somebody.
Last edited by Hobbes; 03-31-2018 at 05:57 PM. Reason: Cleaned up some gibberish text on this old post.

The following 2 users liked this post by Hobbes:
Philip Tsui (12-02-2020),
RomanCisneros (08-01-2020)
08-26-2009, 12:28 PM
#2
AudiWorld Member

Join Date: Jul 2009
Posts: 100
Likes: 0
Received 0 Likes
on
0 Posts
since the filter is above, really would save you time and effort to get an oil extractor. looks like there aren't too many bolts holding that shield in place. my current car has 17-19 bolts and clips that have to be removed to get access to the oil drain plug (and filter).
08-26-2009, 12:36 PM
#3
AudiWorld Senior Member
Thread Starter
since the filter is above, really would save you time and effort to get an oil extractor. looks like there aren't too many bolts holding that shield in place. my current car has 17-19 bolts and clips that have to be removed to get access to the oil drain plug (and filter).
 08-28-2009, 07:26 AM
#5
AudiWorld Member

Join Date: Jul 2008
Location: Greensboro, GA
Posts: 227
Likes: 0
Received 0 Likes
on
0 Posts
Great and useful DIY. I'll be doing this shortly also since I'm between the scheduled AudiCare intervals.
It doesn't look any more complicated (actually easier since the filter is on top) than my old S4, which also had a belly pan that was a little bit of a nuisance to get off but did keep a lot of debris out of the engine compartment.
Thanks again for the informative post.
It doesn't look any more complicated (actually easier since the filter is on top) than my old S4, which also had a belly pan that was a little bit of a nuisance to get off but did keep a lot of debris out of the engine compartment.
Thanks again for the informative post.
08-28-2009, 07:51 AM
#6
AudiWorld Member

Join Date: Dec 2006
Posts: 204
Likes: 0
Received 0 Likes
on
0 Posts
It's probably just my obsessive-compulsiveness, but I always worry that an oil extractor leaves behind the dirtiest oil in the bottom of the oil pan.
Anyway, thanks very much for providing a nice write-up.
Anyway, thanks very much for providing a nice write-up.
08-28-2009, 03:59 PM
#7
AudiWorld Member
Some tips:
- Get a stubby large flathead screwdriver (about 3" long). Works great for the belly pan screws.
- Are you sure the filter cap is a press-fit? On my '09 it's screw on, which is why there's a torque rating molded onto the face of the large hex nut on the cap.
- The cartridge (filter) is sometimes hard to pull off the housing. Took me a while to realize I just had to yank hard. Doing that in a plastic bag ensures not spraying oil everywhere.
- GET AN EXTRACTOR! Makes your life much easier and saves time. I tested by using the extractor and then pulling the drain plug - hardly anything was left.
Trending Topics
08-28-2009, 04:28 PM
#8
AudiWorld Senior Member
Thread Starter
Agreed. A plastic bag makes it much easier.


