Stasis rear sway bar installed
 07-29-2013, 06:28 AM
#1
AudiWorld Super User
Thread Starter

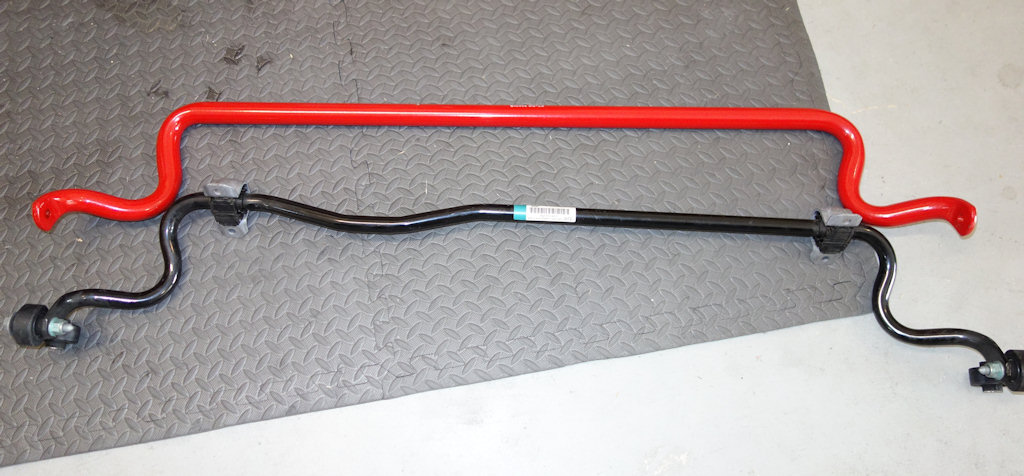
I've been working with Jack at Stasis and he sent me a C7A6 rear sway bar to try on the S6. The Stasis bar is 25.4mm while the stock is 20.7mm per ETKA. I measured 20.89mm using my digital calipers. The stock bar has a little kink to provide extra clearance for a heat shield for the suspension's air compressor.
Clearly the Stasis bar is much beefier than the stock RSB. Not shown in the photo are the included new poly bushings and little tube of silicone grease. You reuse the sway bar brackets and the dog-bone end links.
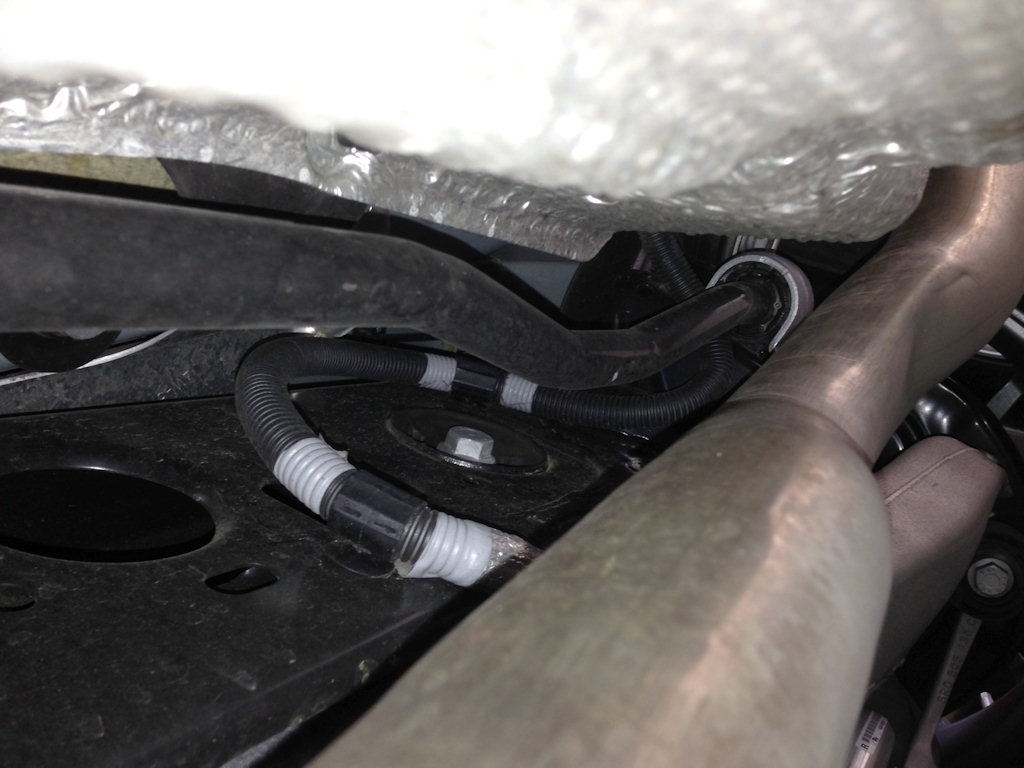
With the shield removed you can see the compressor that's located in front of the RSB and the actual clearance from any hard parts and wiring.
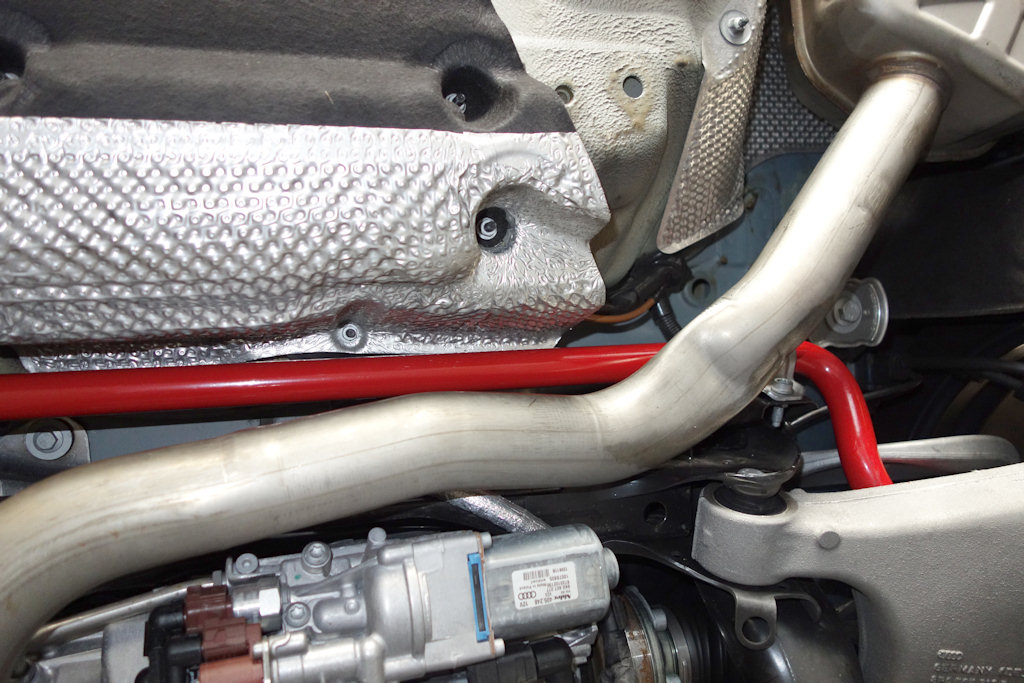
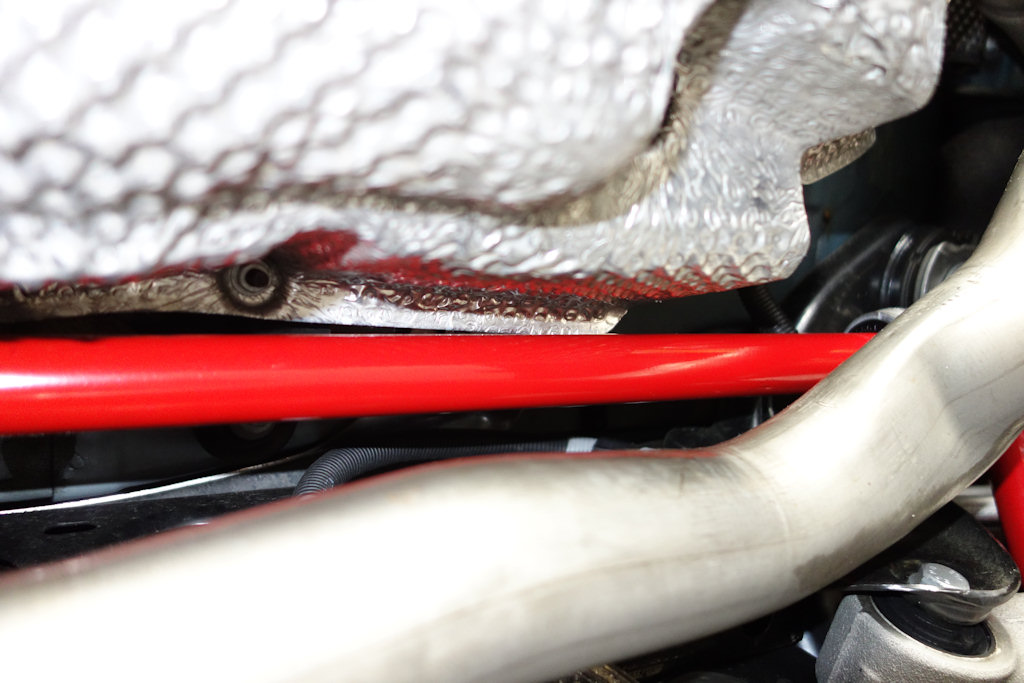
With the shield in place there is maybe 1/2" clearance from the heat shield. I'm not too worried about it since there is additional clearance behind the shield. On a side note, can someone else peek under their car and check the exhaust bend on the right hand side? Mine looks crushed, but from the lack of marks I can tell that I didn't hit anything. The left side is also crushed but not nearly as much. Is this from a poor bend? Other bends look OK.
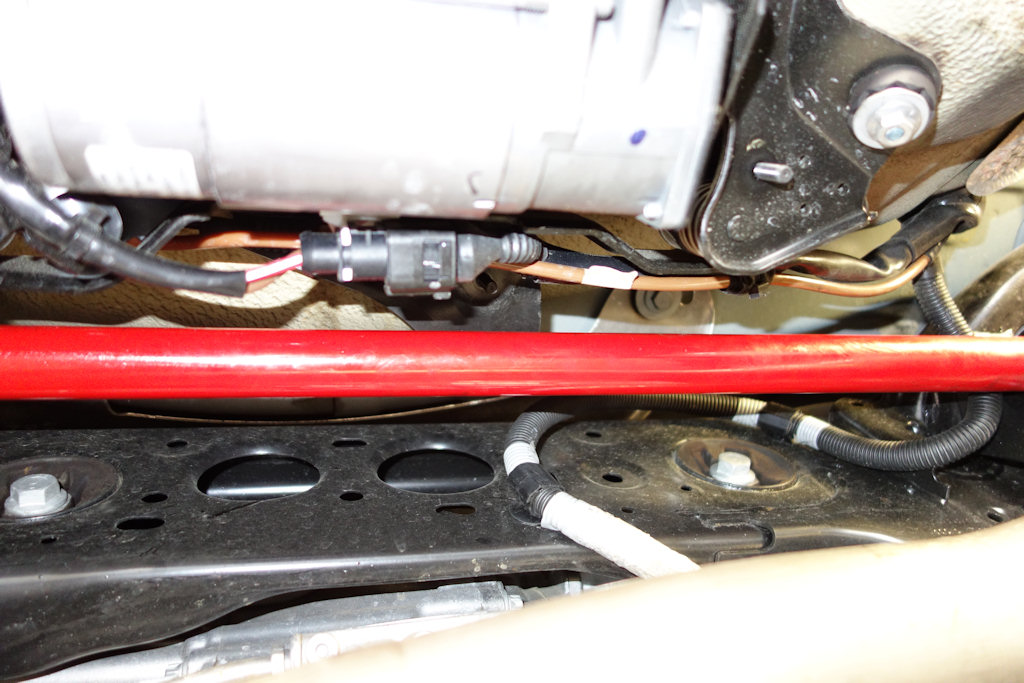
One more shot showing the clearance between the heat shield and RSB.
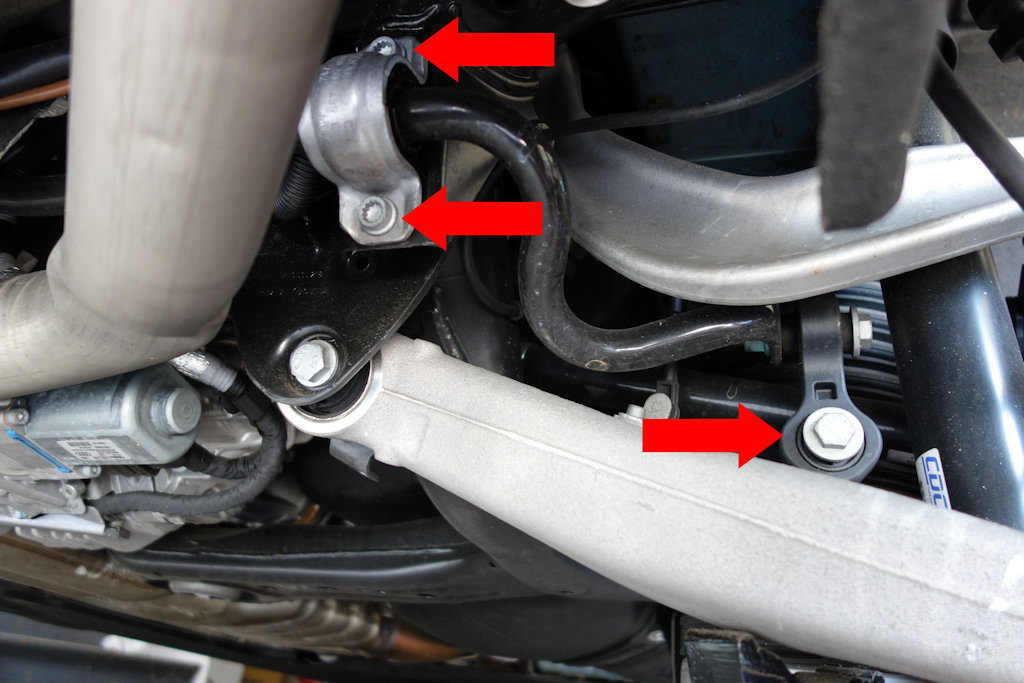
Installation of the bar was relatively straight forward. Remove one 13mm nut on each side securing the exhaust hangers. At this point unplug the wiring on each side that controls the exhaust flap. This will allow the rear end of the exhaust to drop down to provide clearance to remove the old bar and install the new one. You'll need to play with the rotation and angle to get the bar to clear the suspension arms to remove the old bar.
Remove these bolts on both sides to remove the stock bar (10mm triple square, and 16mm). The bolt and nut on the dog-bone are also 16mm FYI.
The bolt torque values provided by Stasis:
ARM Mounting Bracket Bolts, 100mm triple square 29 N*m
Lower Drop Link Bolts, 54 N*m
Upper Drop Link Bolts, 54 N*m
Chassis Cross Brace Bolts, 54 N*m
Exhaust Muffler Hanger Nuts, 20 N*m
Initial impressions:
Body roll is noticeably reduced from stock, which is exactly what I was looking for. So far I can't detect any additional harshness or handling anomalies, but I've only put about 25 miles on the new setup so far. I'll revisit the thread again later once I've had the bar for a while.
Cost was $350 plus shipping ($9 to Georgia).
Clearly the Stasis bar is much beefier than the stock RSB. Not shown in the photo are the included new poly bushings and little tube of silicone grease. You reuse the sway bar brackets and the dog-bone end links.
With the shield removed you can see the compressor that's located in front of the RSB and the actual clearance from any hard parts and wiring.
With the shield in place there is maybe 1/2" clearance from the heat shield. I'm not too worried about it since there is additional clearance behind the shield. On a side note, can someone else peek under their car and check the exhaust bend on the right hand side? Mine looks crushed, but from the lack of marks I can tell that I didn't hit anything. The left side is also crushed but not nearly as much. Is this from a poor bend? Other bends look OK.
One more shot showing the clearance between the heat shield and RSB.
Installation of the bar was relatively straight forward. Remove one 13mm nut on each side securing the exhaust hangers. At this point unplug the wiring on each side that controls the exhaust flap. This will allow the rear end of the exhaust to drop down to provide clearance to remove the old bar and install the new one. You'll need to play with the rotation and angle to get the bar to clear the suspension arms to remove the old bar.
Remove these bolts on both sides to remove the stock bar (10mm triple square, and 16mm). The bolt and nut on the dog-bone are also 16mm FYI.
The bolt torque values provided by Stasis:
ARM Mounting Bracket Bolts, 100mm triple square 29 N*m
Lower Drop Link Bolts, 54 N*m
Upper Drop Link Bolts, 54 N*m
Chassis Cross Brace Bolts, 54 N*m
Exhaust Muffler Hanger Nuts, 20 N*m
Initial impressions:
Body roll is noticeably reduced from stock, which is exactly what I was looking for. So far I can't detect any additional harshness or handling anomalies, but I've only put about 25 miles on the new setup so far. I'll revisit the thread again later once I've had the bar for a while.
Cost was $350 plus shipping ($9 to Georgia).

 07-29-2013, 07:22 AM
#5
AudiWorld Super User

Nice write-up, thanks for posting. Ive always been a fan of how simple a mod like sways can improve handling moreso for less than redoing the whole suspension. I would have been more prone to improve the front first though to increase steering response.
I really wish they came out with an alu kruz for this car.
Trending Topics
07-29-2013, 11:01 AM
#8
AudiWorld Member
Join Date: Aug 2009
Location: Manitowoc, WI
Posts: 335
Likes: 0
Received 0 Likes
on
0 Posts
Thus confirming you need to replace it with aftermarket exhaust
Nice write-up, thanks for posting. Ive always been a fan of how simple a mod like sways can improve handling moreso for less than redoing the whole suspension. I would have been more prone to improve the front first though to increase steering response.
I really wish they came out with an alu kruz for this car.
07-29-2013, 12:02 PM
#10
AudiWorld Member
Join Date: Aug 2009
Location: Manitowoc, WI
Posts: 335
Likes: 0
Received 0 Likes
on
0 Posts
Yeah, I remember seeing that when I took my exhaust off and thought WTF? I didn't care as I was putting the new one on, but I guess it's normal. Just want to make sure this sway bar would have enough room with aftermarket exhaust, but looks like it shouldn't be an issue.