When you click on links to various merchants on this site and make a purchase, this can result in this site earning a commission. Affiliate programs and affiliations include, but are not limited to, the eBay Partner Network.
EKTA help? Need instructions for Illuminated Rings
Update: Download the installation instructions here!
80A-052-111 is a recently introduced part and I can't find any instructions online. The "Service Technical Information" flyer in the box notes part numbers 80A.052.111, 4M0.052.111, and 4M8.052.111 (Q5, Q7, Q8 respectively). It's too complicated for guesswork, so I'm hoping someone has access to ETKA and can share instructions. Thanks!
80A-052-111 is a recently introduced part and I can't find any instructions online. The "Service Technical Information" flyer in the box notes part numbers 80A.052.111, 4M0.052.111, and 4M8.052.111 (Q5, Q7, Q8 respectively). It's too complicated for guesswork, so I'm hoping someone has access to ETKA and can share instructions. Thanks!
Got the part from Chris and just did the install myself. Took 2-3 hours all in.
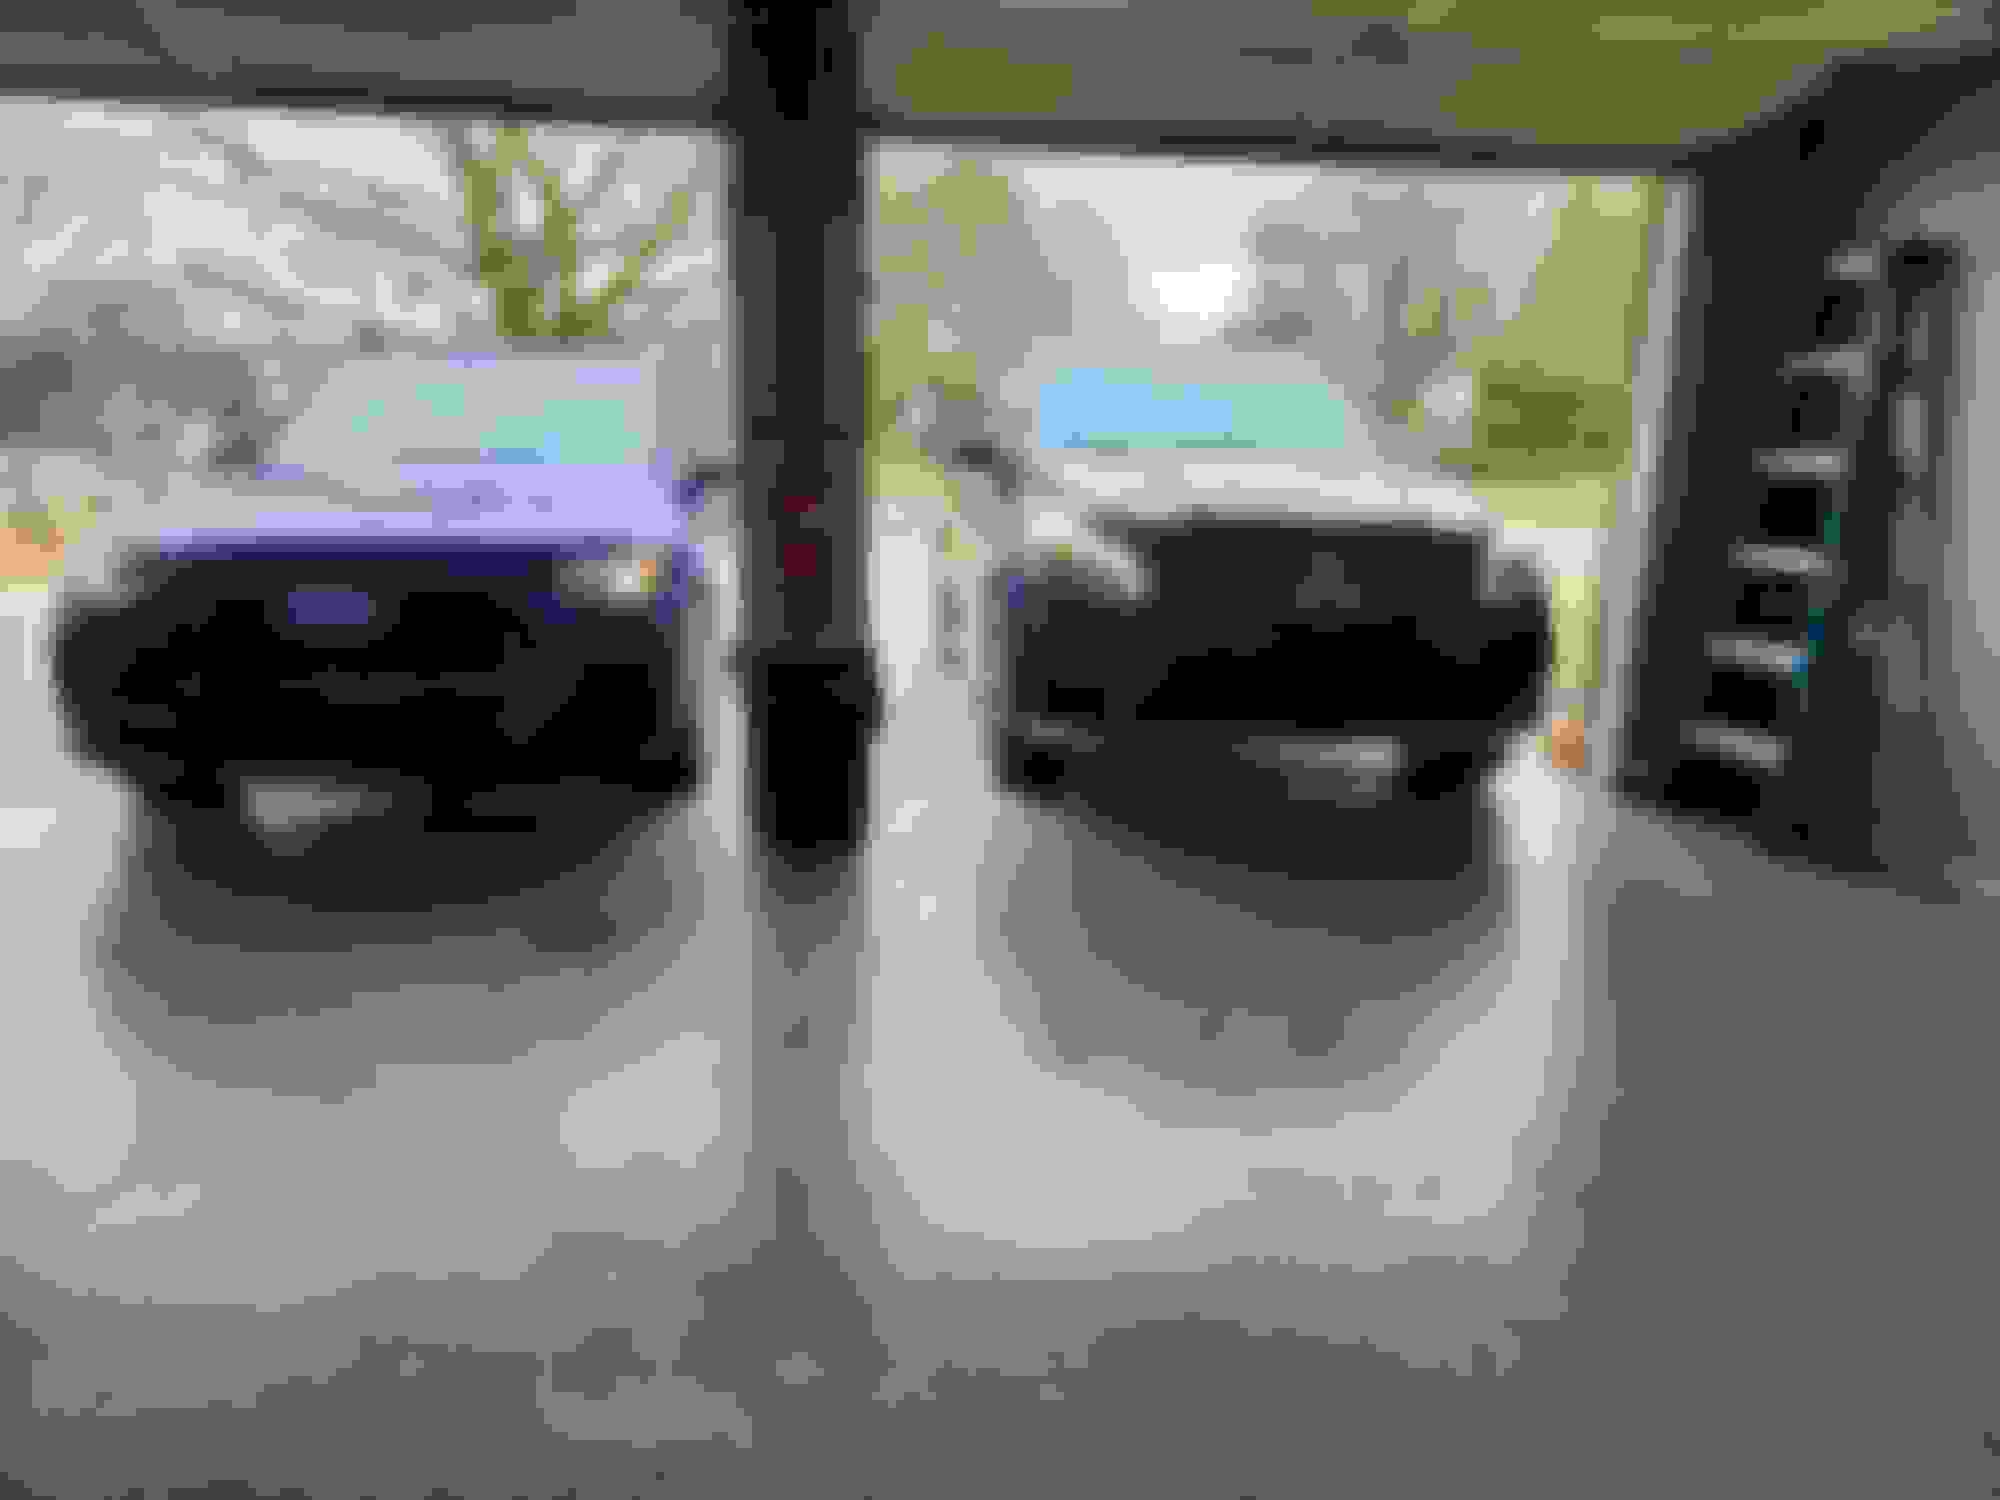
I understand it's not for everyone but I think it looks very cool and adds some specialness to my ride. It does look very nice in person, definitely not 'cheap looking'.
Happy to answer any questions for install if needed
Note: Thanks to Chris @ PartsByTopher for providing the install instructions! I'm installing 80A-052-111 on my '22 SQ5, but the instruction set applies to: Q5 2021+, Q7 2020+, and Q8 2019+. The emblem is --> CHROME <--. (I painted mine black and don't want to confuse anyone.)
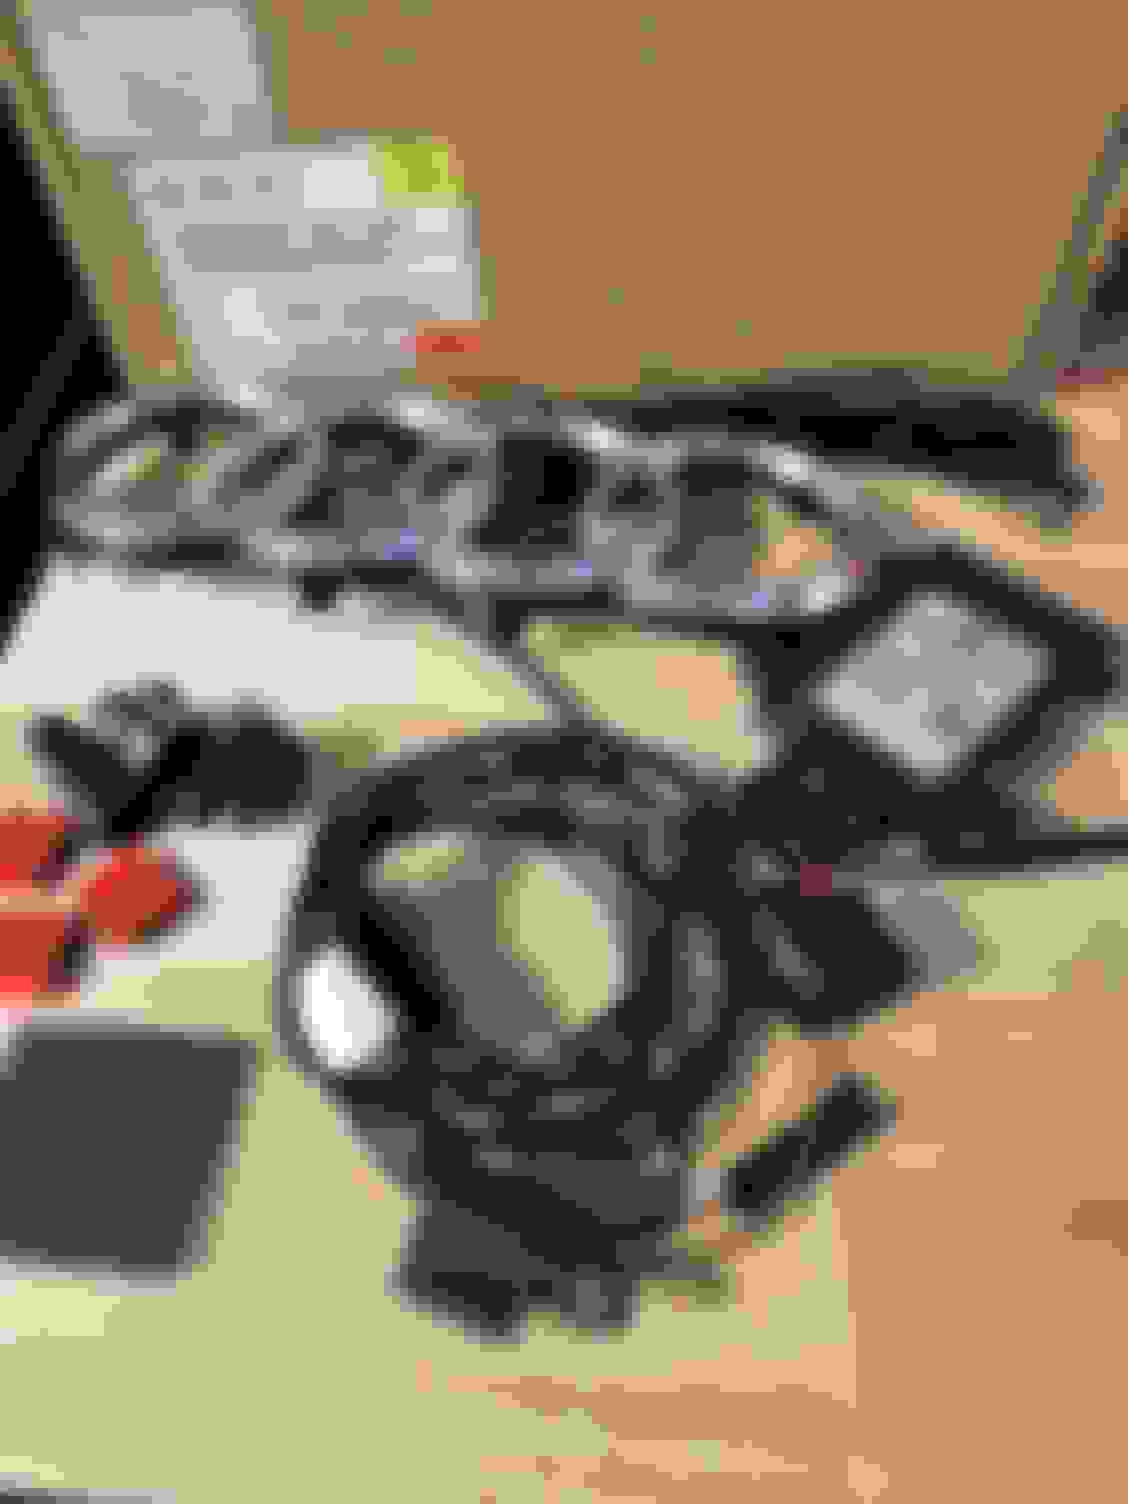
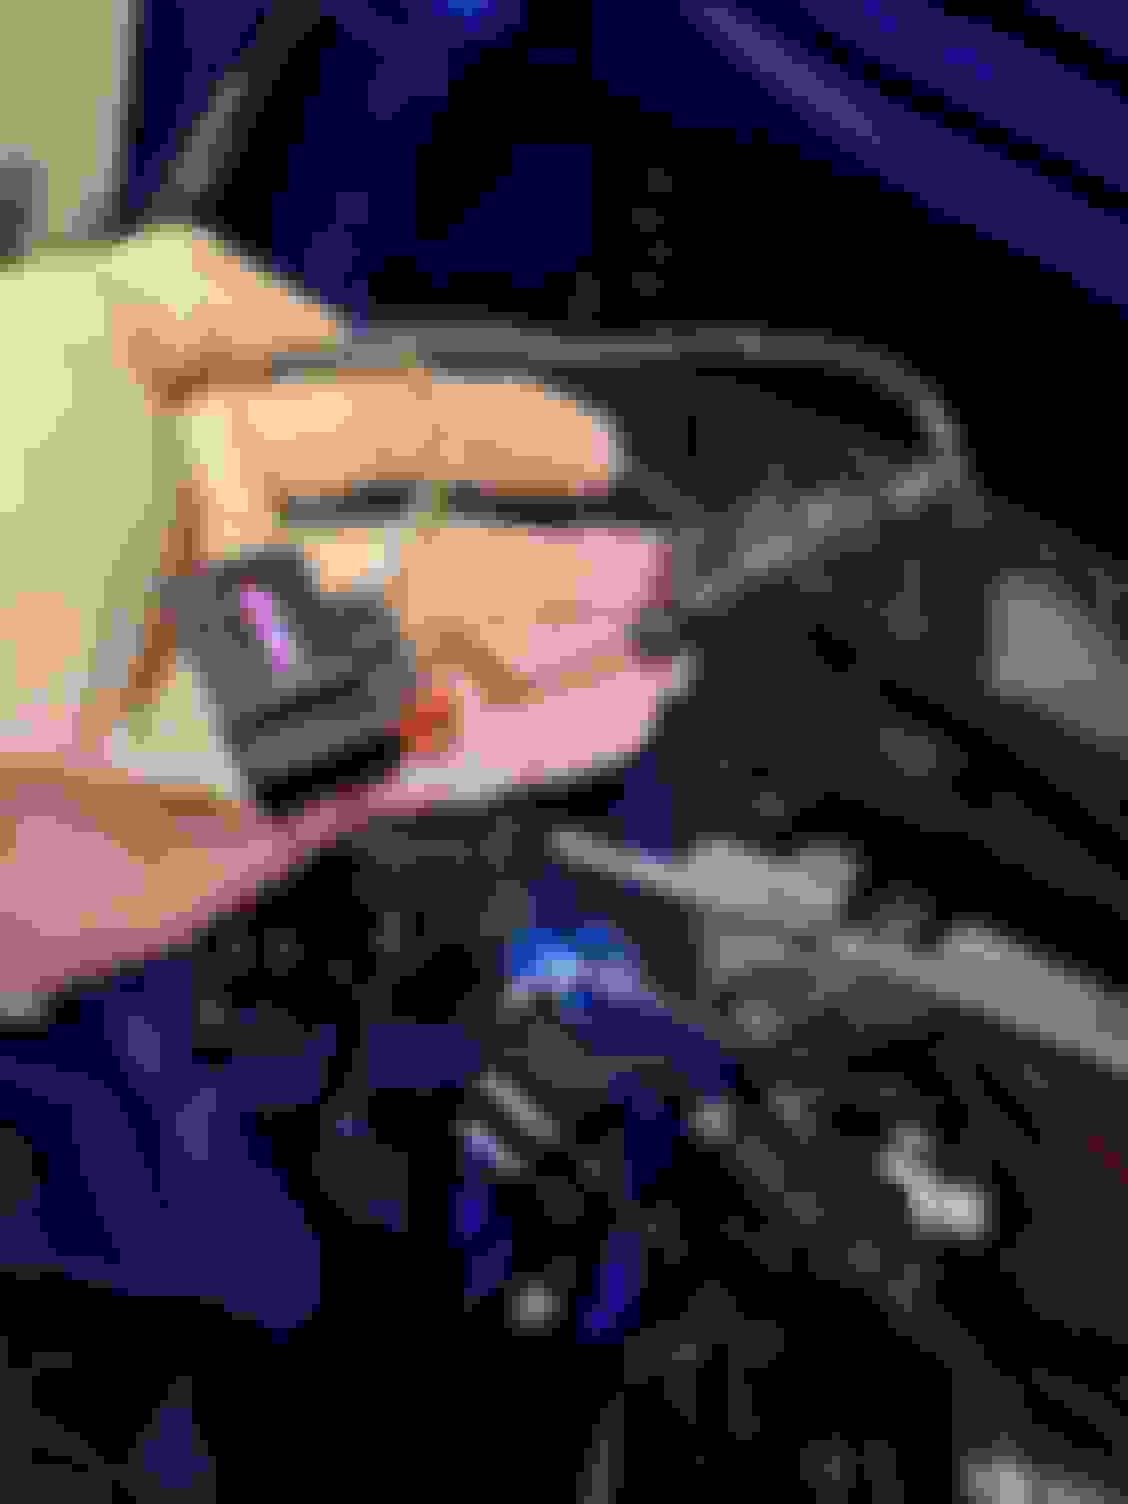
Installation: This is an overview since you'll need the instructions to complete the wiring. The control unit (2) is velcro mounted by the right side firewall where your VIN is etched. Power connections are made at the ground stud (1) and positive junction box (3). Two CAN control wires are unpinned from the right headlight connector (4), fed into the retrofit wiring harness, and two wires from the retrofit harness are pinned back into the headlight connector. (Two small safety pins work fine if you don't have wire terminal tools.) Retrofit harness wiring is then routed to the front grille where you drill a 12mm hole for the power wire to pass through, and sand down a dozen locating tabs to create a flat mounting surface. Drill templates are included in the instructions and you'll need legal size paper, or a way to force printing "actual size" for correct proportions. I agree with ekyp's estimated install time of 2-3 hours.
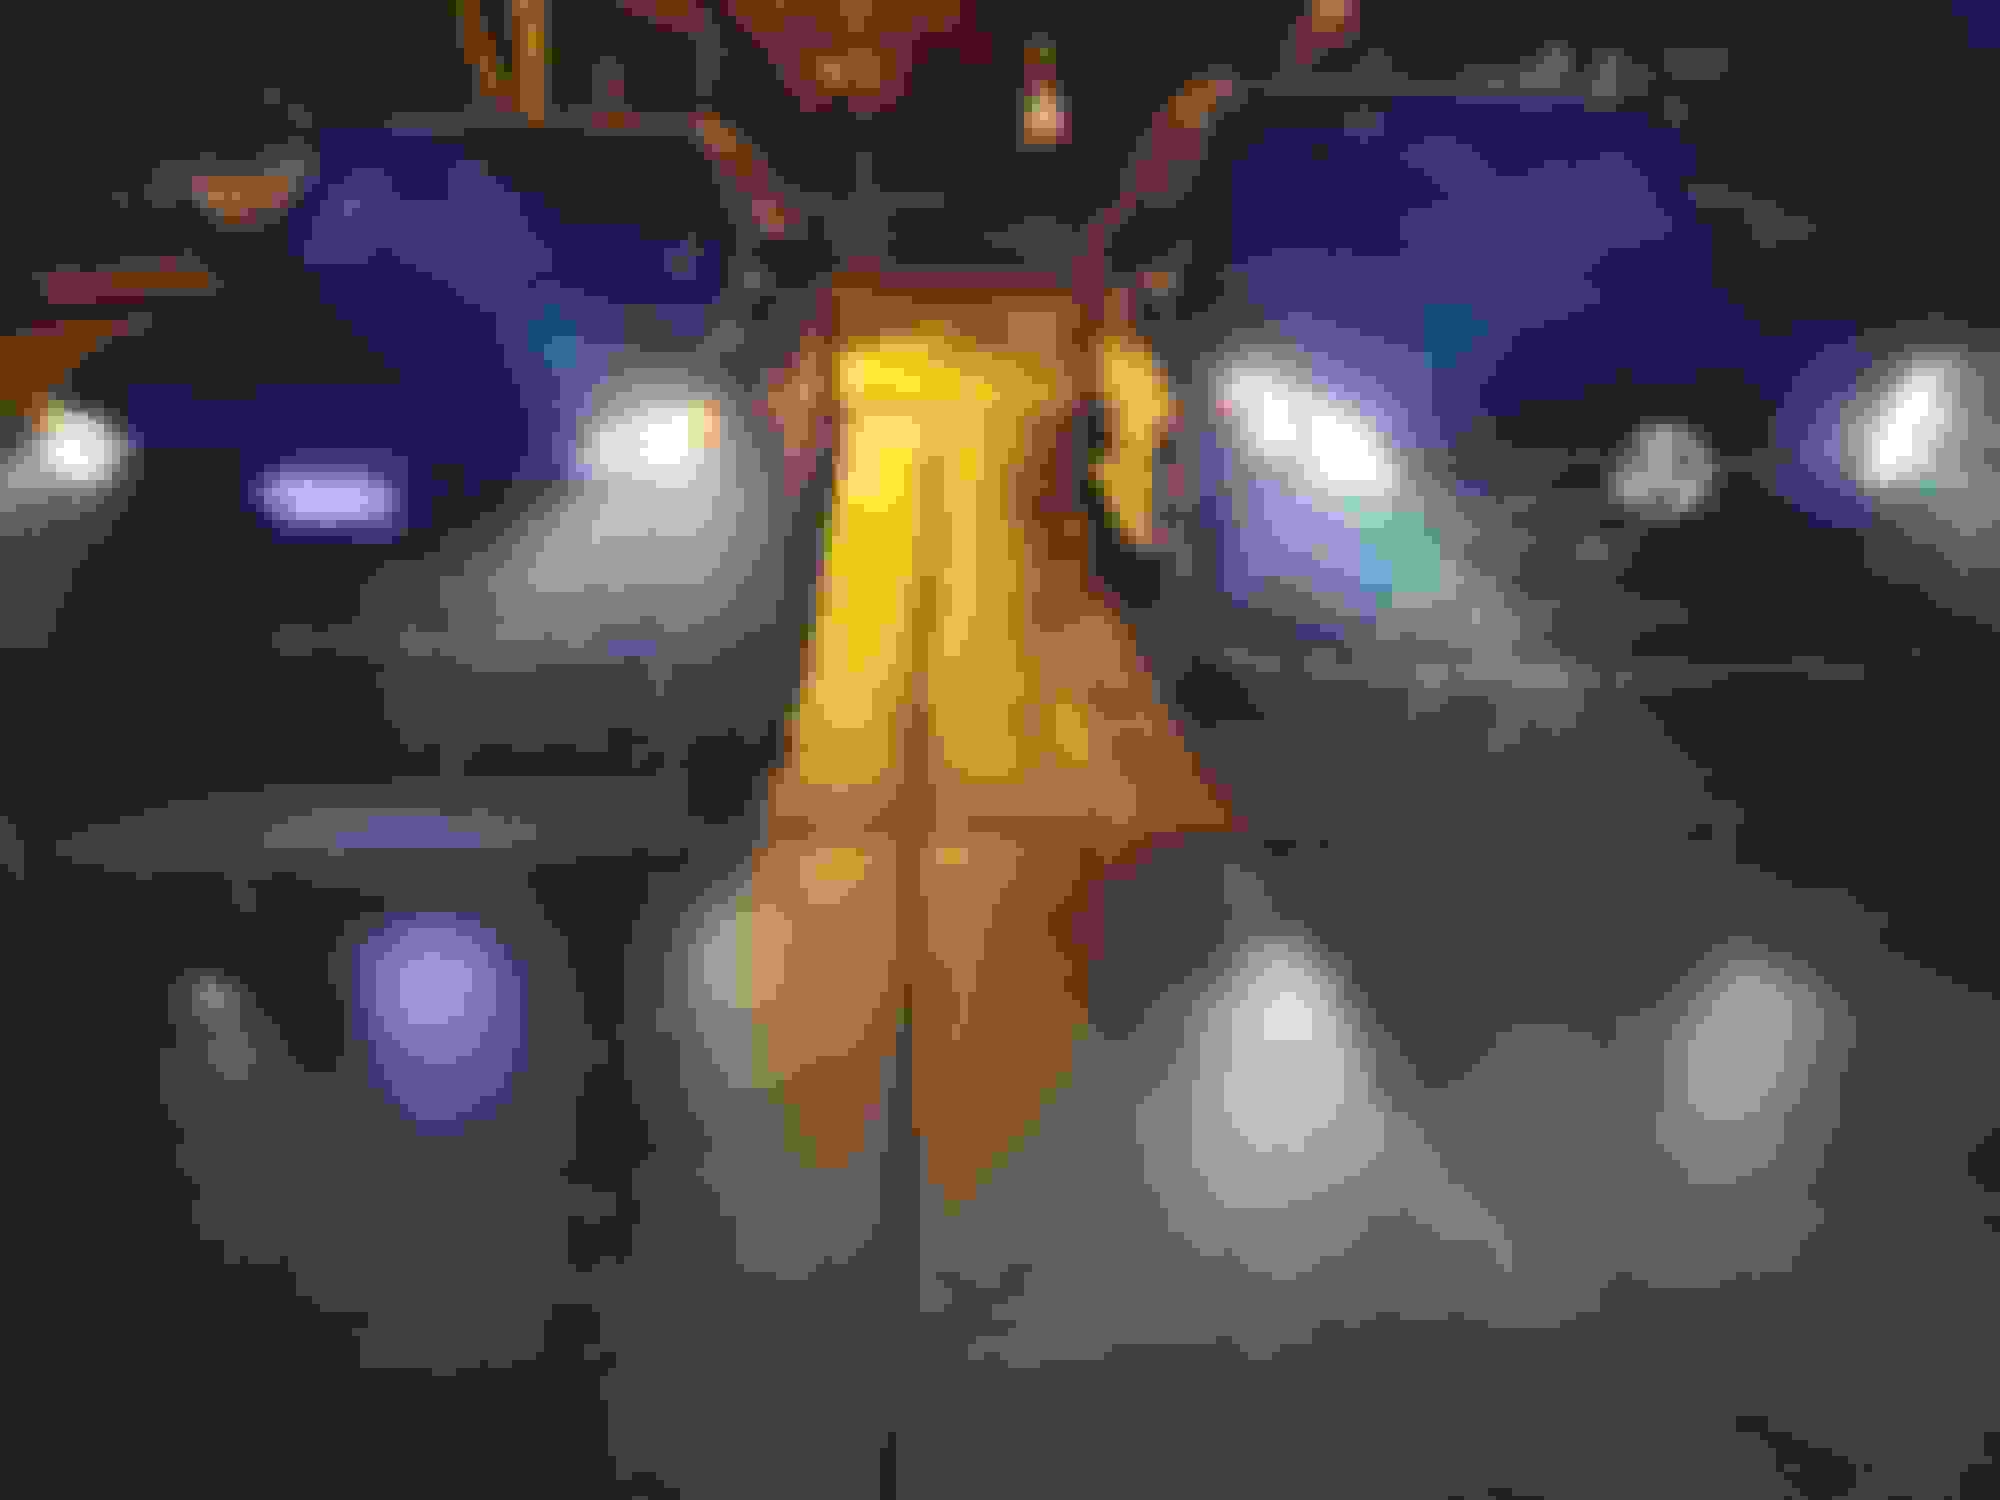
My Impressions: The components are excellent and I know plenty of people will enjoy the accessory / factory option without a single complaint. My nitpicks are: the color temperature is too high, no brightness options available, no black optic option, and the thing that really gives me heartburn is the BRIGHT light element being visible on all sides. Compared to my wife's car, hers looks like a seamless factory option and mine doesn't. I'm going to give it some time to see whether or not I keep it. Hope this helps!
(1) Negative (2) Control Unit (3) Positive (4) Headlight Connector
Last edited by Atari XL; 01-03-2023 at 04:57 PM.
Reason: Cleanup
I'd like to read it, too. Is there any reason it cannot be posted here?
I am unable to upload the PDF here for some reason..
Originally Posted by ekyp
Got the part from Chris and just did the install myself. Took 2-3 hours all in.
I understand it's not for everyone but I think it looks very cool and adds some specialness to my ride. It does look very nice in person, definitely not 'cheap looking'.
Happy to answer any questions for install if needed
Originally Posted by Atari XL
Note: Thanks to Chris @ PartsByTopher for providing the install instructions! I'm installing 80A-052-111 on my '22 SQ5, but the instruction set applies to: Q5 2021+, Q7 2020+, and Q8 2019+. The emblem is --> CHROME <--. (I painted mine black and don't want to confuse anyone.)
Installation: This is an overview since you'll need the instructions to complete the wiring. The control unit (2) is velcro mounted by the right side firewall where your VIN is etched. Power connections are made at the ground stud (1) and positive junction box (3). Two CAN control wires are unpinned from the right headlight connector (4), fed into the retrofit wiring harness, and two wires from the retrofit harness are pinned back into the headlight connector. (Two small safety pins work fine if you don't have wire terminal tools.) Retrofit harness wiring is then routed to the front grille where you drill a 12mm hole for the power wire to pass through, and sand down a dozen locating tabs to create a flat mounting surface. Drill templates are included in the instructions and you'll need legal size paper, or a way to force printing "actual size" for correct proportions. I agree with ekyp's estimated install time of 2-3 hours.
My Impressions: The components are excellent and I know plenty of people will enjoy the accessory / factory option without a single complaint. My nitpicks are: the color temperature is too high, no brightness options available, no black optic option, and the thing that really gives me heartburn is the BRIGHT light element being visible on all sides. Compared to my wife's car, hers looks like a seamless factory option and mine doesn't. I'm going to give it some time to see whether or not I keep it. Hope this helps!
(1) Negative (2) Control Unit (3) Positive (4) Headlight Connector
80A-052-111 is a recently introduced part and I can't find any instructions online. The "Service Technical Information" flyer in the box notes part numbers 80A.052.111, 4M0.052.111, and 4M8.052.111 (Q5, Q7, Q8 respectively). It's too complicated for guesswork, so I'm hoping someone has access to ETKA and can share instructions. Thanks!
80A-052-111 Illuminated Rings Kit
Did not want 4 ring door lights Instead bought door lights from place that always advertises on this site for $40. Removed oem lighting card & snapped in new plain lighting card. It REALLY gives proper lighting now. I wanted better lighting ...not rings. Did this about 6 months ago so price is problemly higher.
 12-31-2022, 02:26 PM