Summer Time DIY mods
 07-09-2012, 01:30 PM
#11
Audiworld Junior Member

That looks amazing. Probably one of the best do it yourself mods I've seen. Do you guys remember the guy with the neon audi rings lol. This is hot I wish I could spray better I suck at it though.

 07-11-2012, 06:36 PM
#13
07-12-2012, 01:01 AM
#14
AudiWorld Member

Join Date: Feb 2011
Location: Charlotte NC
Posts: 100
Likes: 0
Received 0 Likes
on
0 Posts
They are the ones in the link. Th difference between the OP car and mine is I have the single bar grilles and his has the twin bar. For some reason 13" was too much.
Last edited by Philip1; 07-12-2012 at 01:04 AM.
07-12-2012, 10:38 AM
#15
Audiworld Junior Member
07-12-2012, 11:26 AM
#16
AudiWorld Super User
 07-21-2012, 06:34 PM
#18
Audiworld Junior Member
Thread Starter

hey gang,
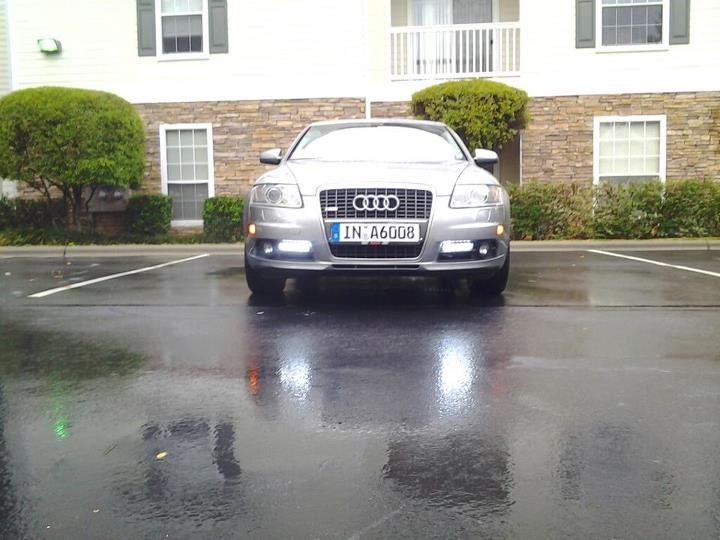
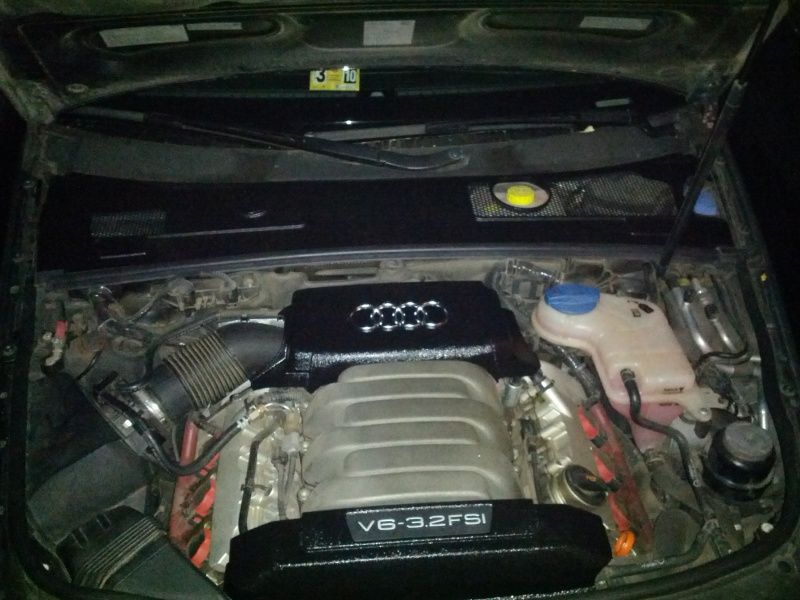
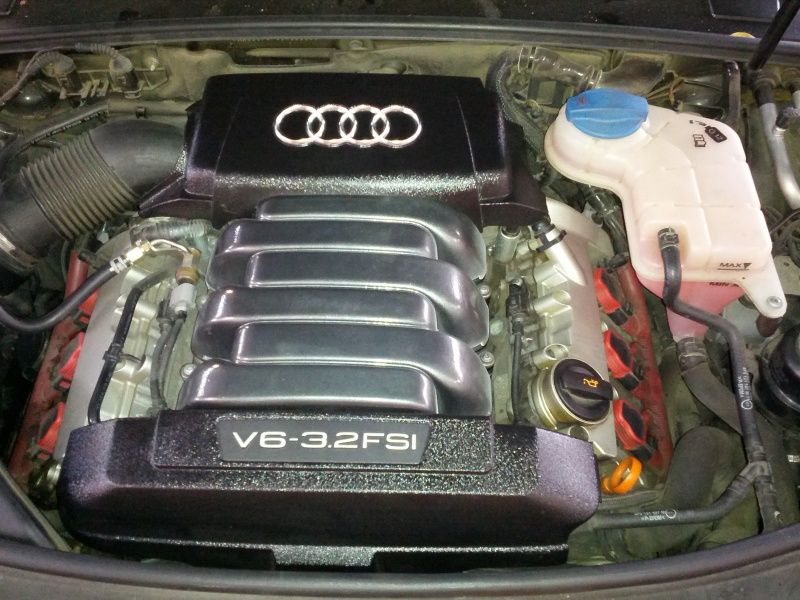
thanks for the compliments on the DIY LED lights. as you guys saw in my first post on this thread that i was painting engine bay parts. i've added in some pictures. i'm still in the process of painting the air box but not yet... but very soon. i wanted to stay relatively close to original but give the car a fresher updated look. i went with hammered gray. i liked how it turned out. it's not over the top but it has a nice shine to it.
The paint stains you see are me testing to see if the krylon fusion hammered gray would work or not from the engine bay heat. it performed and stayed on fine in this 100+ degree texas heat. i drove around with the paint test for over a week.
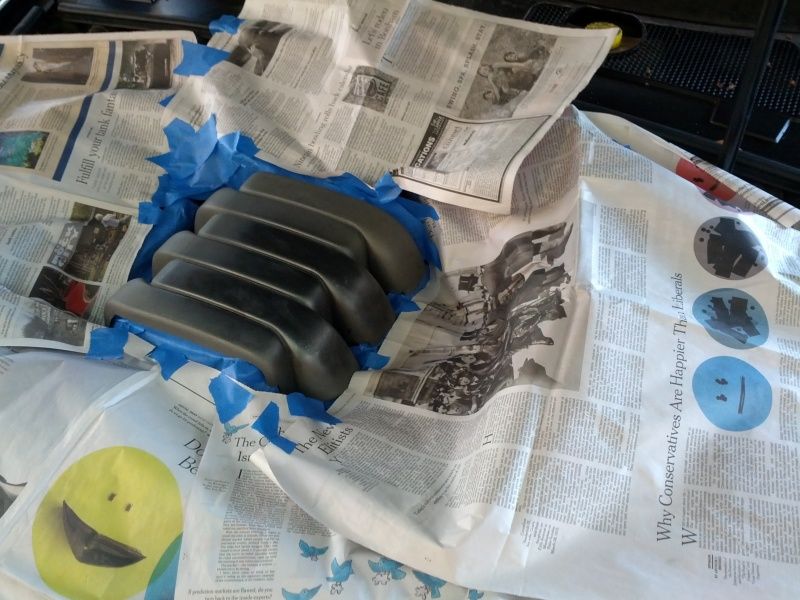
i degreased it with orange hand cleaner and water first and then taped up pretty well. i layed down blue tape first on all of the edges then newspaper and then some more blue tape.
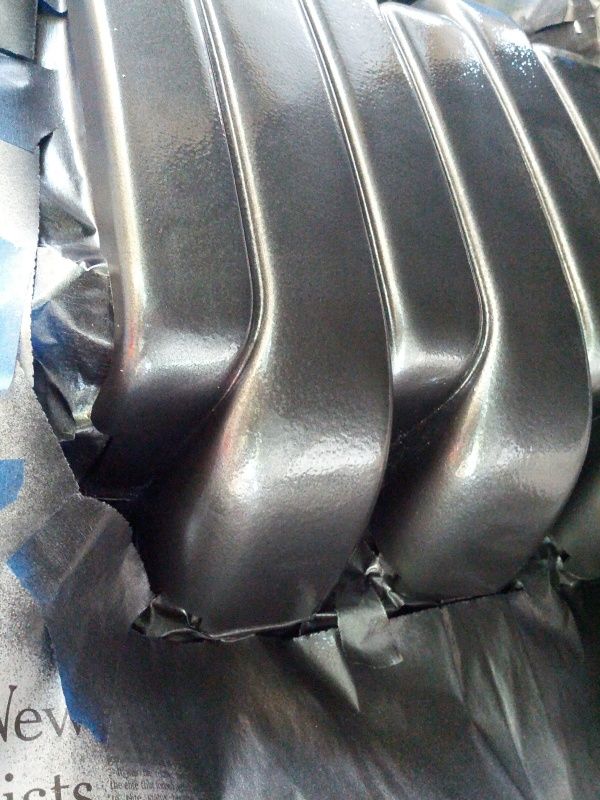
here is the finished results. you can see the dots and dimples in the paint. that was exactly what i was going for, "hammered" look.
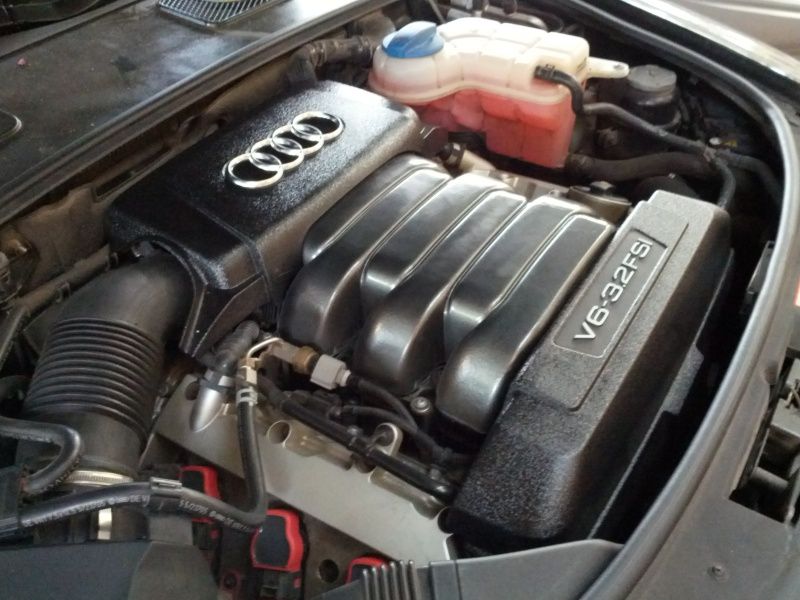
everything put back together. it looks a little funny because i had just sprayed a little protective fusion clear coat on it. it's suppose to protect the paint from all sorts of stuff but when it dried it looks cleaner than the pictures.
BEFORE
AFTER
I'll add more DIY pix as I go along gang. I hope this inspires you to try new things on our cars and feel free to share.
-Van
thanks for the compliments on the DIY LED lights. as you guys saw in my first post on this thread that i was painting engine bay parts. i've added in some pictures. i'm still in the process of painting the air box but not yet... but very soon. i wanted to stay relatively close to original but give the car a fresher updated look. i went with hammered gray. i liked how it turned out. it's not over the top but it has a nice shine to it.
The paint stains you see are me testing to see if the krylon fusion hammered gray would work or not from the engine bay heat. it performed and stayed on fine in this 100+ degree texas heat. i drove around with the paint test for over a week.
i degreased it with orange hand cleaner and water first and then taped up pretty well. i layed down blue tape first on all of the edges then newspaper and then some more blue tape.
here is the finished results. you can see the dots and dimples in the paint. that was exactly what i was going for, "hammered" look.
everything put back together. it looks a little funny because i had just sprayed a little protective fusion clear coat on it. it's suppose to protect the paint from all sorts of stuff but when it dried it looks cleaner than the pictures.
BEFORE
AFTER
I'll add more DIY pix as I go along gang. I hope this inspires you to try new things on our cars and feel free to share.
-Van
Last edited by vlam04; 07-21-2012 at 07:22 PM.
07-24-2012, 02:45 PM
#20
My install takes the passenger side, along the headlight washer tube, then to the drivers side, then up into the engine bay. I have it insulated from the bottom up thru the engine. Right now it terminates by the first firewall along the brake lines until I can decide where to tap it, or how to get it thru the firewall. I see posts on the "keyhole" grommet, but very little access to it.
Rich