2008 A6 Grill Upgrade (to 2009)...PICS!!
 06-22-2012, 11:33 AM
#61
AudiWorld Senior Member
Join Date: Jun 2009
Location: Atlantic City Metro Area
Posts: 792
Likes: 0
Received 2 Likes
on
2 Posts
4F0-853-651-AN-T94 should be the Gloss Black Grill FWD which is badgeless
4F0-853-651-AQ-T94 also found this pn... a Q in the part no itself so maybe Quattro
but please check with your dealer
4F0-853-651-AQ-T94 also found this pn... a Q in the part no itself so maybe Quattro
but please check with your dealer
 10-13-2012, 03:59 PM
#62
AudiWorld Newcomer

Join Date: Oct 2012
Posts: 3
Likes: 0
Received 0 Likes
on
0 Posts
Hi I love the way you did this, i have the same car, where did you purchase the grill front?!?!? THANKS!
OK...I'm no mechanic (or photographer for that matter), so forgive the amateur attempt at a tutorial. I really wanted a grill that would look clean with the front license plate removed...the stock '08 grill does NOT!! I decided to swap out for an '09 grill because it doesn't utilize the "filler" strip. Audi service wanted $800 labor to swap the grills...FU*K THAT!! Since I couldn't find instructions anywhere on how to do this, I had to figure it out myself by trial and error (and a lot of wasted time).
I humbly post the following with the hope that I can save anyone else attempting this the pitfalls I had to endure...especially with the modifications necessary to allow the '09 grill to fit.
You'll need the following;
Here is the '08 grill with the license plate mount removed (you don't need to remove the plate mount to remove the grill)...ugly, huh?

Under the hood (to the left of the hood latch) are two screws that do NOT need to be removed to pull the plastic cover off.

Simply start at either rear corner and pull (up and back) toward you.

Once that cover is off, there are three main Torx screws holding the top of the front end in place (the red arrow shows the right-sided location...there is another one in the same location on the left side). The screws on the sides are significantly longer than the center one. Remove all three using the T30 bit.

Now go underneath the car and, using the standard head screwdriver, remove the three flathead screws that attach the front bumper cover to the black undercarriage cover. Then remove the SIX screws holding the undercarriage cover in place (front three shown in photo, there is one located in the center of the cover and two more at the rear corners.)

Pull undercarriage cover out and set it aside.

Move to either wheel well and, using the T25 bit, remove the three lower Torx screws holding the FRONT of the wheel well liner in place (you only need to pull the liner back...not remove it). There also may be one or more large plastic fasteners holding the liner in place at the bottom...a large coin (U.S. Quarter or larger) works well for removing these.
Sorry no photo...but its fairly straightforward.
Pull back the wheel well liner to expose the Torx screws you'll need to remove next. Still using the T25 bit, remove the following three screws as indicated by the red arrows in the photo below.

There are now only TWO nuts left to remove in order to pull the front bumper cover off the car. The picture below shows the nut on the DRIVERS side. Because the length of the bolt extends so far past the nut when tightened, you'll need a deep-depth 10mm socket.

The location of the nut is set back a good distance from the edge of the wheel well.
FROM THE DRIVERS SIDE - you can reach it one of two ways...either from underneath, which I do not recommend (the plumbing for the Headlamp Washer makes the nut very tricky to visualize, and also restricts the wrench rotation travel), or by using a drive extension bar and going through the wheel well (as pictured below).

This method was MUCH easier than when I tried from under the car, but it was necessary to use both my 6" and 3" extensions together to reach the nut. *NOTE* This is NOT an issue on the passenger side, the other nut is very accessible from underneath!!
PLEASE USE CAUTION WHEN PERFORMING THE FOLLOWING STEP!!
You're now ready to pull back the front bumper, however, unless you're willing to disconnect ALL the hoses and wires that power the Headlamp Washers (which I was not), you CANNOT completely remove the front bumper cover. You can pull it away from the car, but only about 12" or so.

The poorly focused (sorry) photo above shows the mess of hoses (circled in red) that are connected to the bumper's headlamp washers.
Before you begin to remove the bumper cover, place something (non-abrasive, such as cardboard boxes) in front of the car that will support the bumper cover once removed. What you'll need will depend on how high you've lifted the front end of the car, but you have approx TWELVE INCHES of travel before reaching the limits of slack in the washer hoses.
Start on one side and, using quick, firm jerking motions, pull the bumper back a few inches at a time. DO NOT put all your weight into it or attempt to pull off in one swift motion...you'll snap wires and disconnect hoses!!
Here's is what mine looked like, pulled back as far as it would go...

If you see a small bit of water inside the bumper, don't panic...hose clamps arent perfectly water-tight. I had a bit of water drip once I remover my bumper cover, but nothing came loose or disconnected.
You may notice that the solid aluminum bumper that protects the radiator and engine bay is missing in the above photo. I could see that once the filler was removed the aluminum bumper sticks out like a sore thumb (see circled portion of photo below)...definitely would have shown through the '09 grill since it has no filler strip

...so I removed it and painted it gloss black.

The next step is to separate the grill from the bumper cover. You will need to remove twelve Torx screws (using the T20 bit) located on the inside of the grill (pictured below)

This was a real headache and very time consuming (at least for me). Without being able to completely remove the bumper cover and lay it flat, you'll have to locate the screws by "touch" and remove them blindly. This is about the time when I wished I would have disconnected all the headlamp washer hoses!!
Here is the removed S-Line grill along side the replacement '09 grill.

I was told by my Audi dealership's parts dept that the '09 grill would "fit" on the '08 model...however, they did NOT tell me I would first have to make some modifications to both my bumper cover AND the new grill in order to get it to fit. First, the plastic cross-section (circled in photo below) protrudes out too far for the inside of the '09 grill. I had to take my heat gun, soften the plastic and push it in.

Next, the new '09 grill comes with tabs (indicated by red arrows) that specifically fit the '09 A6 bumper cover. I had to cut all of them off to allow the new grill to fit my car.

However, all said and done, here is the result...

Very subtle...but I'm stoked with the way it turned out. It has (in my opinion) a very European style to it...and a MUCH cleaner look without the filler strip splitting the grill in two. I was a bit bummed that I could not reattach my "S-Line" badge to the new grill...but there were EIGHT different configurations, and apparently they ordered the FWD version.
I humbly post the following with the hope that I can save anyone else attempting this the pitfalls I had to endure...especially with the modifications necessary to allow the '09 grill to fit.
You'll need the following;
- Wheel ramps or jack stands (to allow access to undercarriage)
- T20, T25, and T30 Torx (star) bits
- 10mm Deep-depth socket and driver (with 10" drive extension preferred)
- Large Standard Head (flathead) screwdriver
- something to support bumper cover once removed (I used cardboard boxes)
- ...and at least two-hours with nothing better to do!!
Here is the '08 grill with the license plate mount removed (you don't need to remove the plate mount to remove the grill)...ugly, huh?
Under the hood (to the left of the hood latch) are two screws that do NOT need to be removed to pull the plastic cover off.
Simply start at either rear corner and pull (up and back) toward you.
Once that cover is off, there are three main Torx screws holding the top of the front end in place (the red arrow shows the right-sided location...there is another one in the same location on the left side). The screws on the sides are significantly longer than the center one. Remove all three using the T30 bit.
Now go underneath the car and, using the standard head screwdriver, remove the three flathead screws that attach the front bumper cover to the black undercarriage cover. Then remove the SIX screws holding the undercarriage cover in place (front three shown in photo, there is one located in the center of the cover and two more at the rear corners.)
Pull undercarriage cover out and set it aside.
Move to either wheel well and, using the T25 bit, remove the three lower Torx screws holding the FRONT of the wheel well liner in place (you only need to pull the liner back...not remove it). There also may be one or more large plastic fasteners holding the liner in place at the bottom...a large coin (U.S. Quarter or larger) works well for removing these.
Sorry no photo...but its fairly straightforward.
Pull back the wheel well liner to expose the Torx screws you'll need to remove next. Still using the T25 bit, remove the following three screws as indicated by the red arrows in the photo below.
There are now only TWO nuts left to remove in order to pull the front bumper cover off the car. The picture below shows the nut on the DRIVERS side. Because the length of the bolt extends so far past the nut when tightened, you'll need a deep-depth 10mm socket.
The location of the nut is set back a good distance from the edge of the wheel well.
FROM THE DRIVERS SIDE - you can reach it one of two ways...either from underneath, which I do not recommend (the plumbing for the Headlamp Washer makes the nut very tricky to visualize, and also restricts the wrench rotation travel), or by using a drive extension bar and going through the wheel well (as pictured below).
This method was MUCH easier than when I tried from under the car, but it was necessary to use both my 6" and 3" extensions together to reach the nut. *NOTE* This is NOT an issue on the passenger side, the other nut is very accessible from underneath!!
PLEASE USE CAUTION WHEN PERFORMING THE FOLLOWING STEP!!
You're now ready to pull back the front bumper, however, unless you're willing to disconnect ALL the hoses and wires that power the Headlamp Washers (which I was not), you CANNOT completely remove the front bumper cover. You can pull it away from the car, but only about 12" or so.
The poorly focused (sorry) photo above shows the mess of hoses (circled in red) that are connected to the bumper's headlamp washers.
Before you begin to remove the bumper cover, place something (non-abrasive, such as cardboard boxes) in front of the car that will support the bumper cover once removed. What you'll need will depend on how high you've lifted the front end of the car, but you have approx TWELVE INCHES of travel before reaching the limits of slack in the washer hoses.
Start on one side and, using quick, firm jerking motions, pull the bumper back a few inches at a time. DO NOT put all your weight into it or attempt to pull off in one swift motion...you'll snap wires and disconnect hoses!!
Here's is what mine looked like, pulled back as far as it would go...
If you see a small bit of water inside the bumper, don't panic...hose clamps arent perfectly water-tight. I had a bit of water drip once I remover my bumper cover, but nothing came loose or disconnected.
You may notice that the solid aluminum bumper that protects the radiator and engine bay is missing in the above photo. I could see that once the filler was removed the aluminum bumper sticks out like a sore thumb (see circled portion of photo below)...definitely would have shown through the '09 grill since it has no filler strip
...so I removed it and painted it gloss black.
The next step is to separate the grill from the bumper cover. You will need to remove twelve Torx screws (using the T20 bit) located on the inside of the grill (pictured below)
This was a real headache and very time consuming (at least for me). Without being able to completely remove the bumper cover and lay it flat, you'll have to locate the screws by "touch" and remove them blindly. This is about the time when I wished I would have disconnected all the headlamp washer hoses!!
Here is the removed S-Line grill along side the replacement '09 grill.
I was told by my Audi dealership's parts dept that the '09 grill would "fit" on the '08 model...however, they did NOT tell me I would first have to make some modifications to both my bumper cover AND the new grill in order to get it to fit. First, the plastic cross-section (circled in photo below) protrudes out too far for the inside of the '09 grill. I had to take my heat gun, soften the plastic and push it in.
Next, the new '09 grill comes with tabs (indicated by red arrows) that specifically fit the '09 A6 bumper cover. I had to cut all of them off to allow the new grill to fit my car.
However, all said and done, here is the result...
Very subtle...but I'm stoked with the way it turned out. It has (in my opinion) a very European style to it...and a MUCH cleaner look without the filler strip splitting the grill in two. I was a bit bummed that I could not reattach my "S-Line" badge to the new grill...but there were EIGHT different configurations, and apparently they ordered the FWD version.
10-13-2012, 04:15 PM
#63
AudiWorld Newcomer
Join Date: Oct 2012
Posts: 3
Likes: 0
Received 0 Likes
on
0 Posts
10-13-2012, 04:40 PM
#64
AudiWorld Super User
10-15-2012, 06:33 AM
#66
AudiWorld Newcomer
Join Date: Oct 2012
Posts: 3
Likes: 0
Received 0 Likes
on
0 Posts
hey were did you get the grill from and did you have to buy any other additional parts! i love how you did this! great job 
OK...I'm no mechanic (or photographer for that matter), so forgive the amateur attempt at a tutorial. I really wanted a grill that would look clean with the front license plate removed...the stock '08 grill does NOT!! I decided to swap out for an '09 grill because it doesn't utilize the "filler" strip. Audi service wanted $800 labor to swap the grills...FU*K THAT!! Since I couldn't find instructions anywhere on how to do this, I had to figure it out myself by trial and error (and a lot of wasted time).
I humbly post the following with the hope that I can save anyone else attempting this the pitfalls I had to endure...especially with the modifications necessary to allow the '09 grill to fit.
You'll need the following;
Here is the '08 grill with the license plate mount removed (you don't need to remove the plate mount to remove the grill)...ugly, huh?
Under the hood (to the left of the hood latch) are two screws that do NOT need to be removed to pull the plastic cover off.
Simply start at either rear corner and pull (up and back) toward you.
Once that cover is off, there are three main Torx screws holding the top of the front end in place (the red arrow shows the right-sided location...there is another one in the same location on the left side). The screws on the sides are significantly longer than the center one. Remove all three using the T30 bit.
Now go underneath the car and, using the standard head screwdriver, remove the three flathead screws that attach the front bumper cover to the black undercarriage cover. Then remove the SIX screws holding the undercarriage cover in place (front three shown in photo, there is one located in the center of the cover and two more at the rear corners.)
Pull undercarriage cover out and set it aside.
Move to either wheel well and, using the T25 bit, remove the three lower Torx screws holding the FRONT of the wheel well liner in place (you only need to pull the liner back...not remove it). There also may be one or more large plastic fasteners holding the liner in place at the bottom...a large coin (U.S. Quarter or larger) works well for removing these.
Sorry no photo...but its fairly straightforward.
Pull back the wheel well liner to expose the Torx screws you'll need to remove next. Still using the T25 bit, remove the following three screws as indicated by the red arrows in the photo below.
There are now only TWO nuts left to remove in order to pull the front bumper cover off the car. The picture below shows the nut on the DRIVERS side. Because the length of the bolt extends so far past the nut when tightened, you'll need a deep-depth 10mm socket.
The location of the nut is set back a good distance from the edge of the wheel well.
FROM THE DRIVERS SIDE - you can reach it one of two ways...either from underneath, which I do not recommend (the plumbing for the Headlamp Washer makes the nut very tricky to visualize, and also restricts the wrench rotation travel), or by using a drive extension bar and going through the wheel well (as pictured below).
This method was MUCH easier than when I tried from under the car, but it was necessary to use both my 6" and 3" extensions together to reach the nut. *NOTE* This is NOT an issue on the passenger side, the other nut is very accessible from underneath!!
PLEASE USE CAUTION WHEN PERFORMING THE FOLLOWING STEP!!
You're now ready to pull back the front bumper, however, unless you're willing to disconnect ALL the hoses and wires that power the Headlamp Washers (which I was not), you CANNOT completely remove the front bumper cover. You can pull it away from the car, but only about 12" or so.
The poorly focused (sorry) photo above shows the mess of hoses (circled in red) that are connected to the bumper's headlamp washers.
Before you begin to remove the bumper cover, place something (non-abrasive, such as cardboard boxes) in front of the car that will support the bumper cover once removed. What you'll need will depend on how high you've lifted the front end of the car, but you have approx TWELVE INCHES of travel before reaching the limits of slack in the washer hoses.
Start on one side and, using quick, firm jerking motions, pull the bumper back a few inches at a time. DO NOT put all your weight into it or attempt to pull off in one swift motion...you'll snap wires and disconnect hoses!!
Here's is what mine looked like, pulled back as far as it would go...
If you see a small bit of water inside the bumper, don't panic...hose clamps arent perfectly water-tight. I had a bit of water drip once I remover my bumper cover, but nothing came loose or disconnected.
You may notice that the solid aluminum bumper that protects the radiator and engine bay is missing in the above photo. I could see that once the filler was removed the aluminum bumper sticks out like a sore thumb (see circled portion of photo below)...definitely would have shown through the '09 grill since it has no filler strip
...so I removed it and painted it gloss black.
The next step is to separate the grill from the bumper cover. You will need to remove twelve Torx screws (using the T20 bit) located on the inside of the grill (pictured below)
This was a real headache and very time consuming (at least for me). Without being able to completely remove the bumper cover and lay it flat, you'll have to locate the screws by "touch" and remove them blindly. This is about the time when I wished I would have disconnected all the headlamp washer hoses!!
Here is the removed S-Line grill along side the replacement '09 grill.
I was told by my Audi dealership's parts dept that the '09 grill would "fit" on the '08 model...however, they did NOT tell me I would first have to make some modifications to both my bumper cover AND the new grill in order to get it to fit. First, the plastic cross-section (circled in photo below) protrudes out too far for the inside of the '09 grill. I had to take my heat gun, soften the plastic and push it in.
Next, the new '09 grill comes with tabs (indicated by red arrows) that specifically fit the '09 A6 bumper cover. I had to cut all of them off to allow the new grill to fit my car.
However, all said and done, here is the result...
Very subtle...but I'm stoked with the way it turned out. It has (in my opinion) a very European style to it...and a MUCH cleaner look without the filler strip splitting the grill in two. I was a bit bummed that I could not reattach my "S-Line" badge to the new grill...but there were EIGHT different configurations, and apparently they ordered the FWD version.
I humbly post the following with the hope that I can save anyone else attempting this the pitfalls I had to endure...especially with the modifications necessary to allow the '09 grill to fit.
You'll need the following;
- Wheel ramps or jack stands (to allow access to undercarriage)
- T20, T25, and T30 Torx (star) bits
- 10mm Deep-depth socket and driver (with 10" drive extension preferred)
- Large Standard Head (flathead) screwdriver
- something to support bumper cover once removed (I used cardboard boxes)
- ...and at least two-hours with nothing better to do!!
Here is the '08 grill with the license plate mount removed (you don't need to remove the plate mount to remove the grill)...ugly, huh?
Under the hood (to the left of the hood latch) are two screws that do NOT need to be removed to pull the plastic cover off.
Simply start at either rear corner and pull (up and back) toward you.
Once that cover is off, there are three main Torx screws holding the top of the front end in place (the red arrow shows the right-sided location...there is another one in the same location on the left side). The screws on the sides are significantly longer than the center one. Remove all three using the T30 bit.
Now go underneath the car and, using the standard head screwdriver, remove the three flathead screws that attach the front bumper cover to the black undercarriage cover. Then remove the SIX screws holding the undercarriage cover in place (front three shown in photo, there is one located in the center of the cover and two more at the rear corners.)
Pull undercarriage cover out and set it aside.
Move to either wheel well and, using the T25 bit, remove the three lower Torx screws holding the FRONT of the wheel well liner in place (you only need to pull the liner back...not remove it). There also may be one or more large plastic fasteners holding the liner in place at the bottom...a large coin (U.S. Quarter or larger) works well for removing these.
Sorry no photo...but its fairly straightforward.
Pull back the wheel well liner to expose the Torx screws you'll need to remove next. Still using the T25 bit, remove the following three screws as indicated by the red arrows in the photo below.
There are now only TWO nuts left to remove in order to pull the front bumper cover off the car. The picture below shows the nut on the DRIVERS side. Because the length of the bolt extends so far past the nut when tightened, you'll need a deep-depth 10mm socket.
The location of the nut is set back a good distance from the edge of the wheel well.
FROM THE DRIVERS SIDE - you can reach it one of two ways...either from underneath, which I do not recommend (the plumbing for the Headlamp Washer makes the nut very tricky to visualize, and also restricts the wrench rotation travel), or by using a drive extension bar and going through the wheel well (as pictured below).
This method was MUCH easier than when I tried from under the car, but it was necessary to use both my 6" and 3" extensions together to reach the nut. *NOTE* This is NOT an issue on the passenger side, the other nut is very accessible from underneath!!
PLEASE USE CAUTION WHEN PERFORMING THE FOLLOWING STEP!!
You're now ready to pull back the front bumper, however, unless you're willing to disconnect ALL the hoses and wires that power the Headlamp Washers (which I was not), you CANNOT completely remove the front bumper cover. You can pull it away from the car, but only about 12" or so.
The poorly focused (sorry) photo above shows the mess of hoses (circled in red) that are connected to the bumper's headlamp washers.
Before you begin to remove the bumper cover, place something (non-abrasive, such as cardboard boxes) in front of the car that will support the bumper cover once removed. What you'll need will depend on how high you've lifted the front end of the car, but you have approx TWELVE INCHES of travel before reaching the limits of slack in the washer hoses.
Start on one side and, using quick, firm jerking motions, pull the bumper back a few inches at a time. DO NOT put all your weight into it or attempt to pull off in one swift motion...you'll snap wires and disconnect hoses!!
Here's is what mine looked like, pulled back as far as it would go...
If you see a small bit of water inside the bumper, don't panic...hose clamps arent perfectly water-tight. I had a bit of water drip once I remover my bumper cover, but nothing came loose or disconnected.
You may notice that the solid aluminum bumper that protects the radiator and engine bay is missing in the above photo. I could see that once the filler was removed the aluminum bumper sticks out like a sore thumb (see circled portion of photo below)...definitely would have shown through the '09 grill since it has no filler strip
...so I removed it and painted it gloss black.
The next step is to separate the grill from the bumper cover. You will need to remove twelve Torx screws (using the T20 bit) located on the inside of the grill (pictured below)
This was a real headache and very time consuming (at least for me). Without being able to completely remove the bumper cover and lay it flat, you'll have to locate the screws by "touch" and remove them blindly. This is about the time when I wished I would have disconnected all the headlamp washer hoses!!
Here is the removed S-Line grill along side the replacement '09 grill.
I was told by my Audi dealership's parts dept that the '09 grill would "fit" on the '08 model...however, they did NOT tell me I would first have to make some modifications to both my bumper cover AND the new grill in order to get it to fit. First, the plastic cross-section (circled in photo below) protrudes out too far for the inside of the '09 grill. I had to take my heat gun, soften the plastic and push it in.
Next, the new '09 grill comes with tabs (indicated by red arrows) that specifically fit the '09 A6 bumper cover. I had to cut all of them off to allow the new grill to fit my car.
However, all said and done, here is the result...
Very subtle...but I'm stoked with the way it turned out. It has (in my opinion) a very European style to it...and a MUCH cleaner look without the filler strip splitting the grill in two. I was a bit bummed that I could not reattach my "S-Line" badge to the new grill...but there were EIGHT different configurations, and apparently they ordered the FWD version.
10-15-2012, 09:30 PM
#67
Audiworld Junior Member
Thread Starter

Join Date: Apr 2009
Posts: 10
Likes: 0
Received 0 Likes
on
0 Posts
2009 grill was purchased directly from my Audi dealer's Parts Dept. My service advisor got them to sell it to me at COST (although I don't remember how much that was)!!
NO other parts are necessary to do this swap.
10-18-2012, 06:56 AM
#68
Audiworld Junior Member

Join Date: Jan 2011
Posts: 68
Likes: 0
Received 0 Likes
on
0 Posts
Somehow I could not find the 4F0-853-651-AQ-T94 part number in Parts.com, but the first one works.
08-24-2013, 06:44 AM
#70
AudiWorld Senior Member
Hmmm...
It turns out that there's a difference between yours and mine car Lungfixer..
My car is a 2005/06 model 2.0 TDI...
The bumper/undercarriage covers are different.
I only needed to remove the three screws on the left..
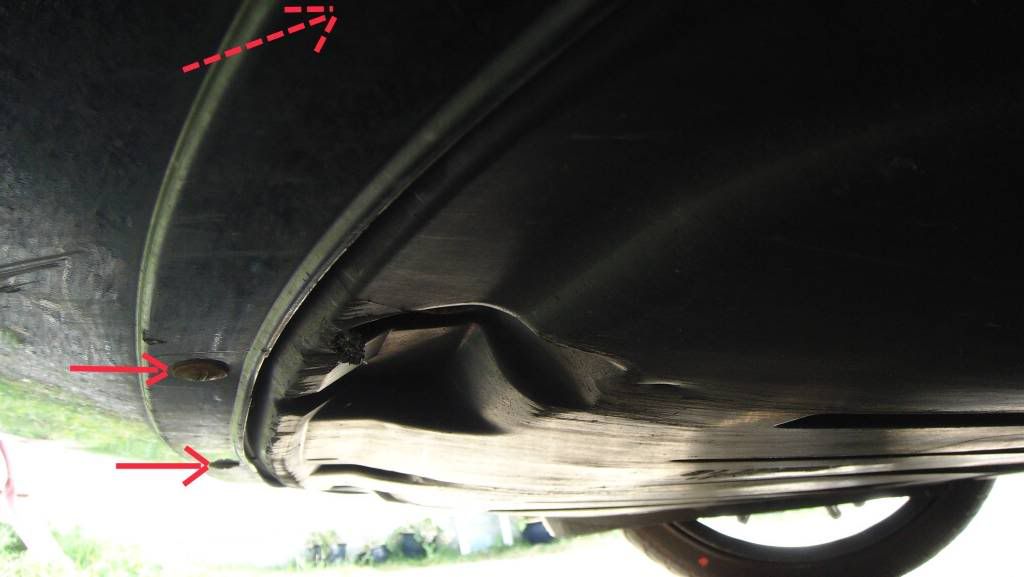
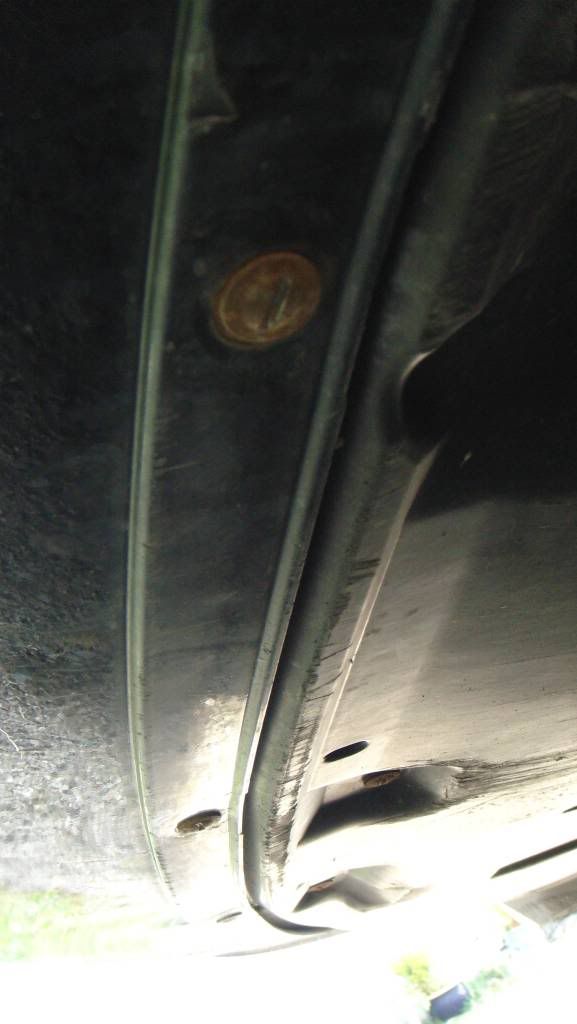
Yes.. I know..
The former owner had strange parking habits..
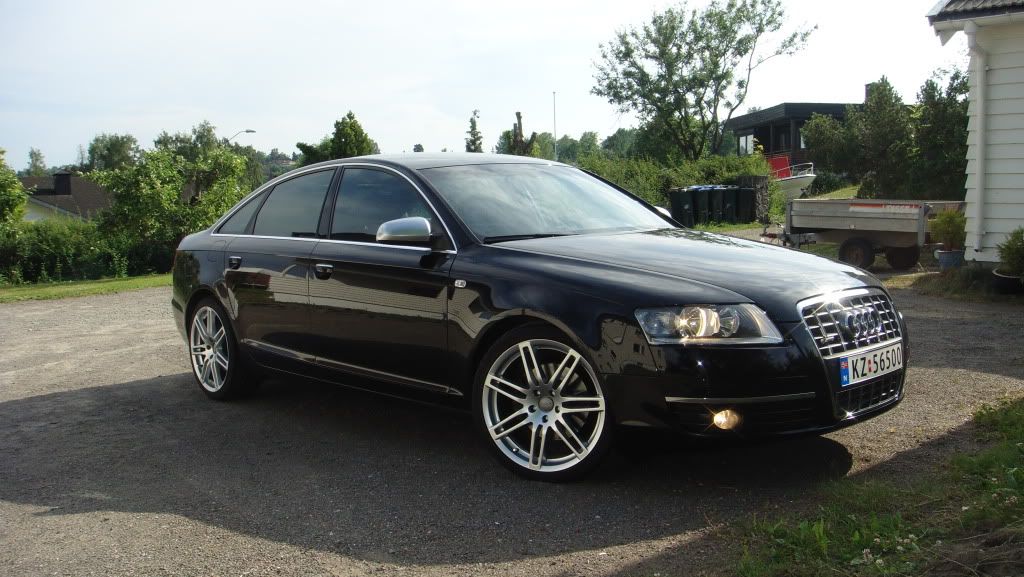
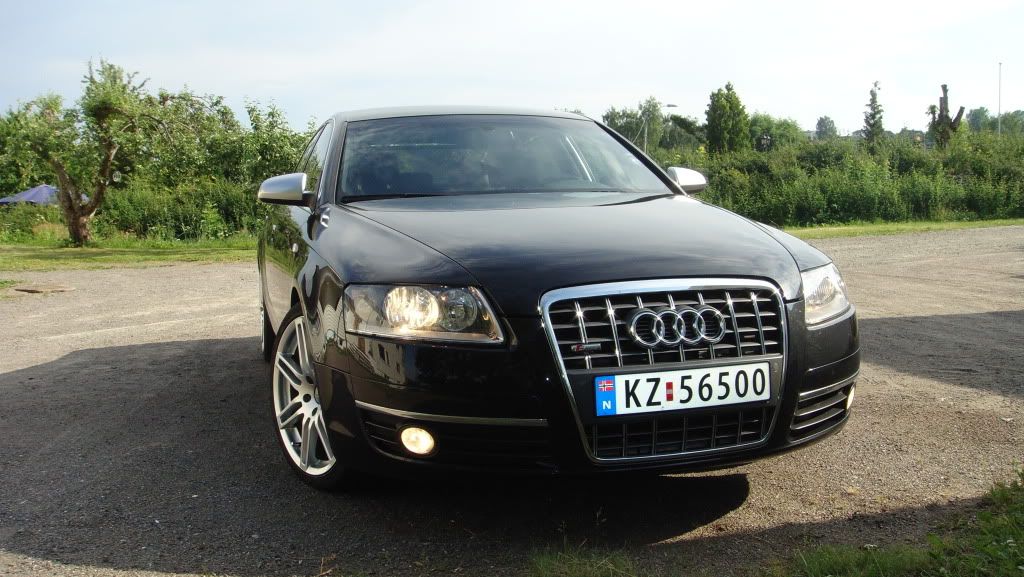
Btw... This is my little black gem..
It turns out that there's a difference between yours and mine car Lungfixer..
My car is a 2005/06 model 2.0 TDI...
The bumper/undercarriage covers are different.
I only needed to remove the three screws on the left..
Yes.. I know..
The former owner had strange parking habits..
Btw... This is my little black gem..