Last edit by: IB Advertising
See related guides and technical advice from our community experts:
- Audi Q5 How to Replace Brake Fluid<br>Step by step instructions for do-it-yourself repairs.
2005 A6 3.2 Brake Bleeding Sequence
#1
AudiWorld Super User
Thread Starter
Join Date: Mar 2000
Location: Raleigh, NC
Posts: 6,493
Likes: 0
Received 0 Likes
on
0 Posts
Guys whats the correct order for bleeding the brakes? I replaced front pads and rotors this weekend but had a stripped caliper bold that required me to completely remove the caliper in order to get it out. lots of air in the brake lines, need to bleed them.
Thanks.
Thanks.
#3
The only one- proper way of bleeding brakes in 2005 Audi A6-is to push the brake fluid trough brake fluid reservoir.
Apply 28 PSI pressure to brake fluid reservoir and open bleeding screws
Bleeding sequence for left and right hand drive vehicles
1 - Left front brake caliper
2 - Right front brake caliper
3 - Left rear brake caliper
4 - Right rear brake caliper
– Bleed until brake fluid escapes with no bubbles and foam.
– Close bleeder screw.
Remember to keep adding brake fluid to fluid reservoir
#4
The only one- proper way of bleeding brakes in 2005 Audi A6-is to push the brake fluid trough brake fluid reservoir.
Apply 28 PSI pressure to brake fluid reservoir and open bleeding screws
Bleeding sequence for left and right hand drive vehicles
1 - Left front brake caliper
2 - Right front brake caliper
3 - Left rear brake caliper
4 - Right rear brake caliper
– Bleed until brake fluid escapes with no bubbles and foam.
– Close bleeder screw.
Remember to keep adding brake fluid to fluid reservoir
Apply 28 PSI pressure to brake fluid reservoir and open bleeding screws
Bleeding sequence for left and right hand drive vehicles
1 - Left front brake caliper
2 - Right front brake caliper
3 - Left rear brake caliper
4 - Right rear brake caliper
– Bleed until brake fluid escapes with no bubbles and foam.
– Close bleeder screw.
Remember to keep adding brake fluid to fluid reservoir
#5
AudiWorld Super User
The correct brake fluid bleeding sequence per Bentley Manual is as follows:
* Right Rear
* Left Rear
* Right Front
* Left Front
This sequence is based on pressurizing the brake fluid reservoir and forcing new fluid through the system. If you bleeding the brake hydraulic system w/o using the reservoir being presurized, you should pump the brake pedal several times, push, and then hold while another person opens the bleeder valve at each wheel to drain fluid in the sequence above. Air will nearly always be forced to the furthest distance from the master cylinder because it is compressible while the hyraulic fluid isn't. Given that you removed a front caliper, then the air entered the caliper supply line at that break. As long as you didn't pump the pedal while the system was open, you probably can get the air out strictly by bleeding that caliper. But to be safe and ensure you get all of the air out of the system, I would bleed all four wheels in the order above.
The following users liked this post:
das60 (08-22-2021)
#6
AudiWorld Senior Member
A6Gary and the Bentley are correct. Always start bleeding the longest lines first and work towards the shortest.
You should bleed the brakes every 2-3 years to replace the fluid because it absorbs moisture. As long as you are bleeding to get they air out of one line you might as well do all 4 and put in fresh fluid.
I strongly recommend a pressure bleeder, it makes the job simple. If you use a vacuum bleeder you will be swearing at the thing the whole time and if you use a friend on the brake pedal they have to know what they are doing or you will end up swearing at your friend.
Good Luck.
The following users liked this post:
das60 (08-22-2021)
#7
The correct brake fluid bleeding sequence per Bentley Manual is as follows:
* Right Rear
* Left Rear
* Right Front
* Left Front
This sequence is based on pressurizing the brake fluid reservoir and forcing new fluid through the system. If you bleeding the brake hydraulic system w/o using the reservoir being presurized, you should pump the brake pedal several times, push, and then hold while another person opens the bleeder valve at each wheel to drain fluid in the sequence above. Air will nearly always be forced to the furthest distance from the master cylinder because it is compressible while the hyraulic fluid isn't. Given that you removed a front caliper, then the air entered the caliper supply line at that break. As long as you didn't pump the pedal while the system was open, you probably can get the air out strictly by bleeding that caliper. But to be safe and ensure you get all of the air out of the system, I would bleed all four wheels in the order above.
* Right Rear
* Left Rear
* Right Front
* Left Front
This sequence is based on pressurizing the brake fluid reservoir and forcing new fluid through the system. If you bleeding the brake hydraulic system w/o using the reservoir being presurized, you should pump the brake pedal several times, push, and then hold while another person opens the bleeder valve at each wheel to drain fluid in the sequence above. Air will nearly always be forced to the furthest distance from the master cylinder because it is compressible while the hyraulic fluid isn't. Given that you removed a front caliper, then the air entered the caliper supply line at that break. As long as you didn't pump the pedal while the system was open, you probably can get the air out strictly by bleeding that caliper. But to be safe and ensure you get all of the air out of the system, I would bleed all four wheels in the order above.
Trending Topics
#8
Vehicles with Electronic Stabilization Program (ESP), bleeding procedure For Audi and VW Cars from Audi repair manual
The only one- proper way of bleeding brakes in 2005 Audi A6-is to push the brake fluid trough brake fluid reservoir.
Apply 28 PSI pressure to brake fluid reservoir and open bleeding screws
Bleeding sequence for left and right hand drive vehicles
1 - Left front brake caliper
2 - Right front brake caliper
3 - Left rear brake caliper
4 - Right rear brake caliper
– Bleed until brake fluid escapes with no bubbles and foam.
– Close bleeder screw.
Remember to keep adding brake fluid to fluid reservoir
#9
B]Brake Fluid Flush[/B] (should be performed every 2 years)- 1 Hour. You will need 1 liter of recommended dot 4 brake fluid. I used ATE Super Blue so I could see when the gold fluid was flushed out of the lines. I will use the OEM gold on my next flush. You will also need a Motive pressure bleeder (recommended), about a ¼ inch bleed plastic tube (comes with Motive pressure bleeder), catch container of some sort, light, flathead screwdriver, funnel, rubber gloves, towel and an 11mm wrench.
So there are about 4 ways to do a brake fluid flush. These methods include gravity flushing/bleeding, pressure flushing/bleeding, vacuum flushing, brake pedal bleeding. I cover the pressure flush/bleed method as it’s the best overall way to do the flush for the DIY. However, if you don’t want to spend 50 bucks (trust me it’s worth it) on a pressure bleeder, then the gravity method is the safest, but most time consuming method as all you have to do is open all the bleeder nipples and let gravity drain the fluid out as long as the car is jacked up and that the bleed line and catch container are below the caliper (not recommended though). Also make sure that the reservoir NEVER runs empty. The other two methods, using the brake pedal (can damage the seals in the master cylinder if the brake pedal is depressed too far) and vacumming (requires expensive tools) are not recommended for the DIY.
So first things first, DO NOT LET THE BRAKE FLUID RESERVOIR GO EMPTY!!! I cannot stress this enough. If you do, then you have to use vag-com to bleed your ABS pump. I will post instructions at the end in the event this happens. If you don’t have vag-com then your car will have to be towed to your mechanic / dealer as the car will not be drivable. Also, be careful not to get any brake fluid on your paint, clothes, hands…as brake fluid will ruin just about anything it touches.
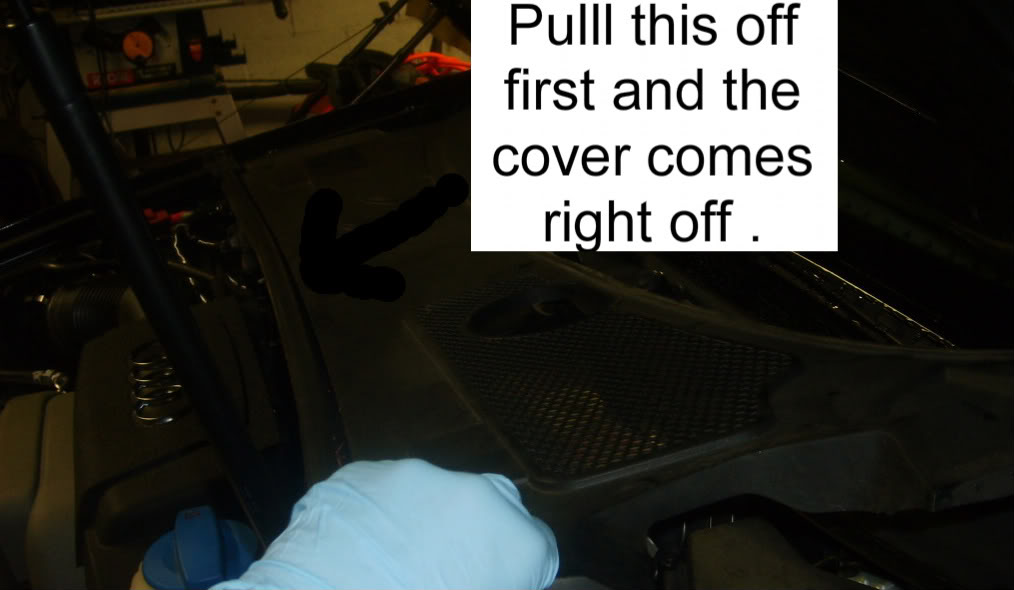
1) Throw on some rubber gloves, pop the hood and remove the black cover over the brake fluid reservoir by pulling off the rubber gasket that is holding it in place and the simply pullit off.
2) Next, pop the hood, rap some towels around the brake fluid reservoir, takeoff the brake reservoir cap. I popped out plastic screen for no reason as you don't have too. Again make sure brake fluid doesn't get on your paint.
3) Remove most of the brake fluid using a turkey baster, syringe, a baby snot sucker thing (I used one of my daughters, lol). DO NOT SUCK IT ALL OUT, leave some as you do not want air entering the system. Also, obviously DO NOT REUSE the turkey baster in the house. If you don't have one you can just bleed it out. Sucking it out just saves a little time.
4) Fill the reservoir with your new fluid and leave the cap off.
5) Attach your EMPTY pressure bleeder to the reservoir and pressurize to 10-15 psi. Check the pressure for about 30 seconds to make sure the pressure remains constant. If the pressure drops, then there is a leak somewhere. Tighten all connections and make sure the pressure remains constant.
6) Next depressurize the bleeder by removing the cap to the BLEEDER, not the cap connected to the reservoir. ALWAYS depressurize by opening the cap on the bleeder, not on the reservoir!
7) At this point you have the option of filling your pressure bleeder with brake fluid or leaving it empty and just using the pressure to push the fluid through (you should fill the bleeder thoough unless you want to make it harder on yourself). Placing 1 liter of fluid in the bleeder ensures that the reservoir will not run dry. Connect to the reservoir and pressurize to 10-15psi. Do not go over or you could bust some **** up.
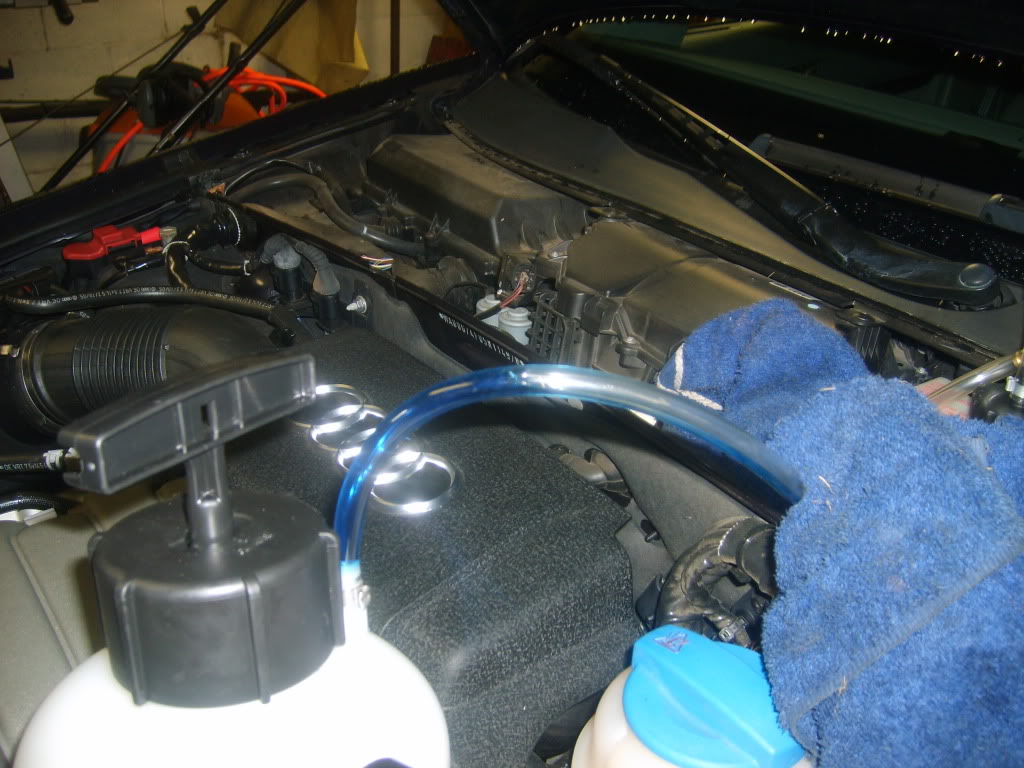
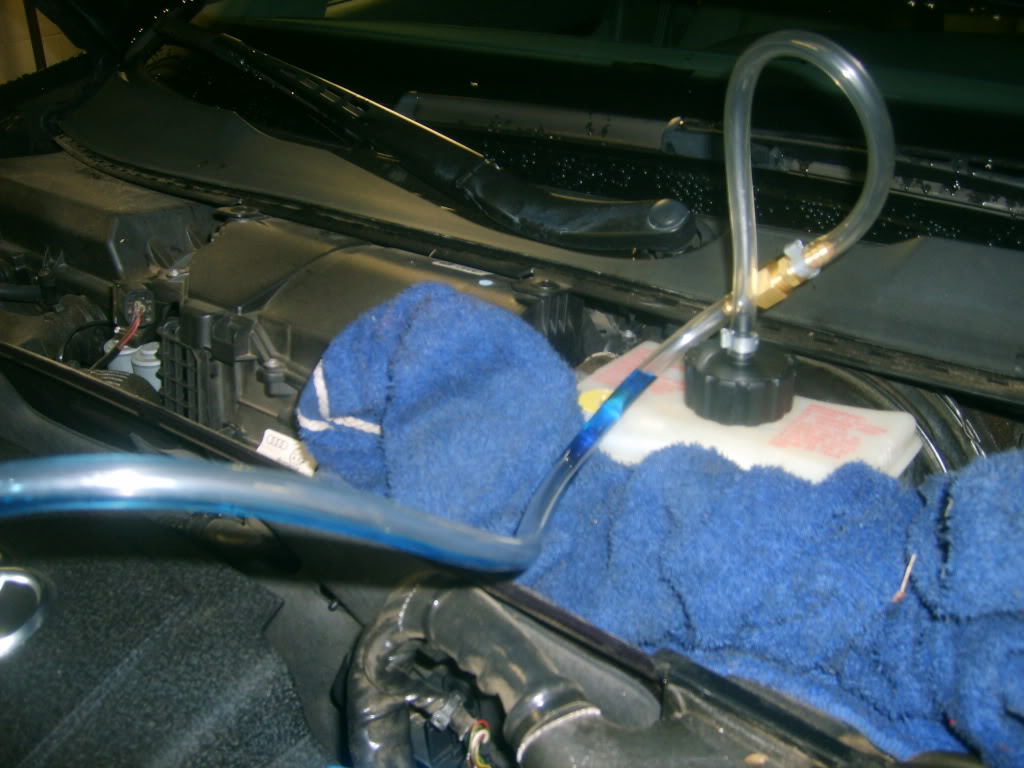
8 ) Jack up the rear of the car if you want more space when getting under the car. I didn't bother to jack up the rear of the car. I just slid underneath the car. I really didn't even have to do this as you can work next to the wheel and reach behind the wheel and access the nipple. That's how I later did the fronts.
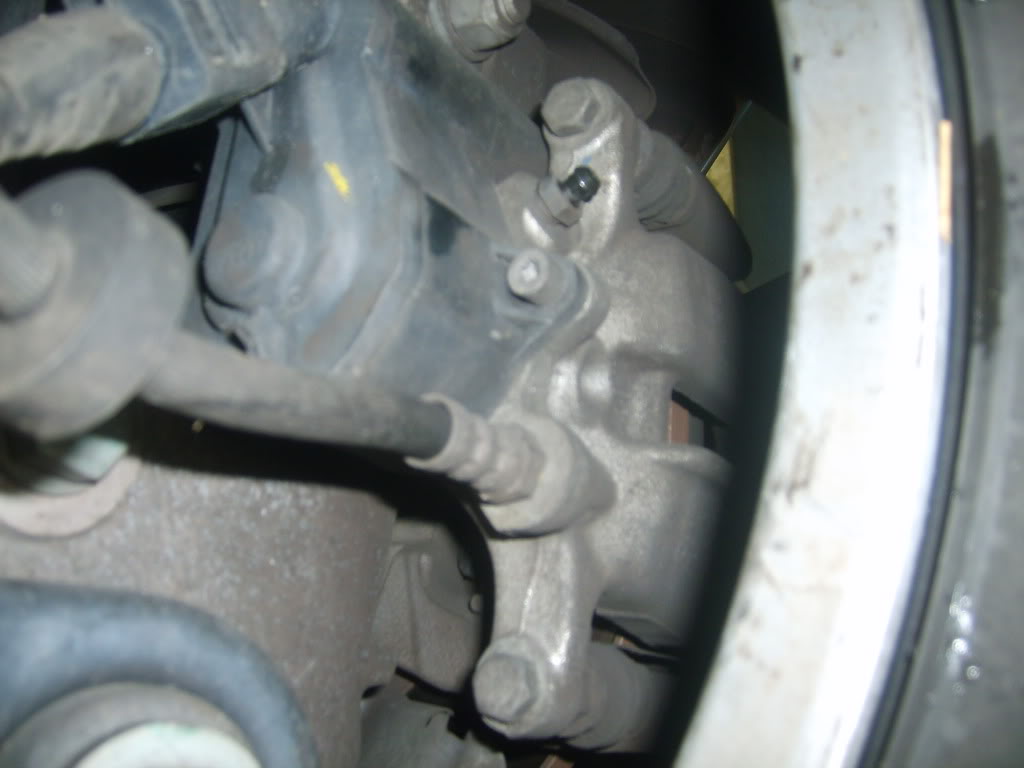
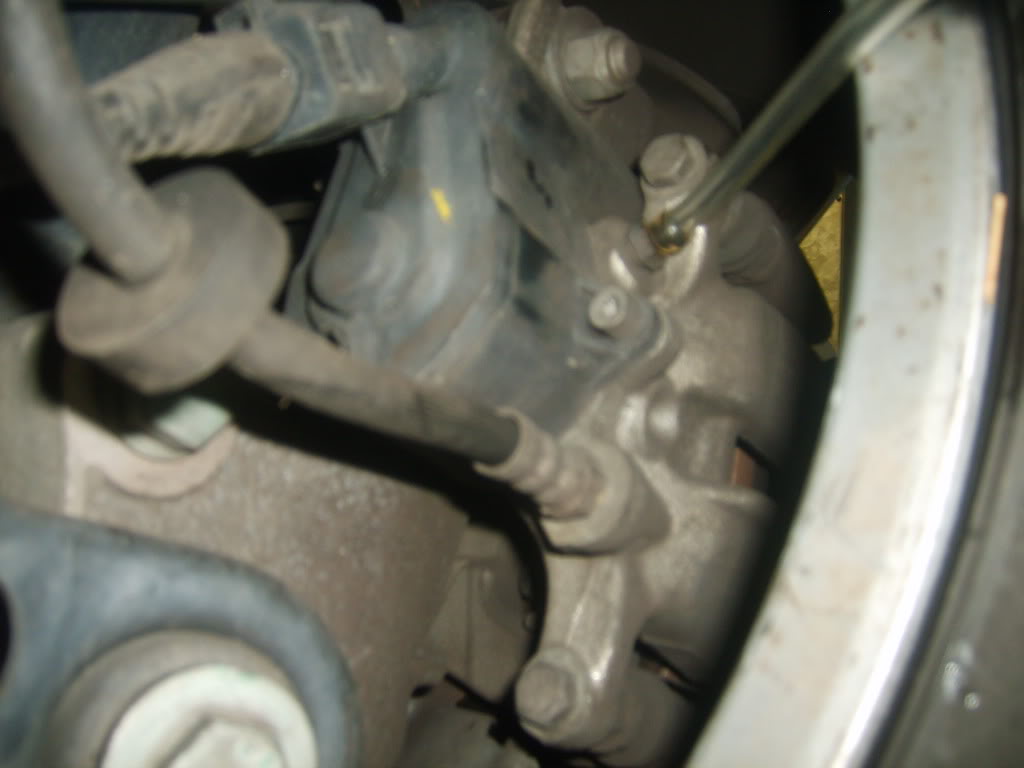
9) If you choose not to fill the bleeder (not recommeded) be sure to check and refill your reservoir at least once or twice when doing each of the rear lines. This ensures your reservoir does not run dry. Starting with the right rear of the car (if you are sitting in the driver seat), locate the bleed screw on the caliper.
10) Remove the nipple cover. Place your 11mm wrench on the screw. Connect your bleed tube, then loosen the screw. Again, for the rears, if u r opting not to put fluid in the bleeder, allow some of the old fluid to drain out (about 20 to 30 seconds) then close the nipple and add more fluid. If you are putting fluid in the pressure bleeder just allow it to drain until you see the new fluid being flushed. Again I used the blue fluid to see when all of the old fluid was flushed out. Without it, it will be difficult to determine when the new all of the old fluid is flushed out unless you know how much should be drained, Once I saw the blue fluid draining out, I continued to let it drain for an additional ten to twenty seconds to be sure all of the old fluid was out of the line.
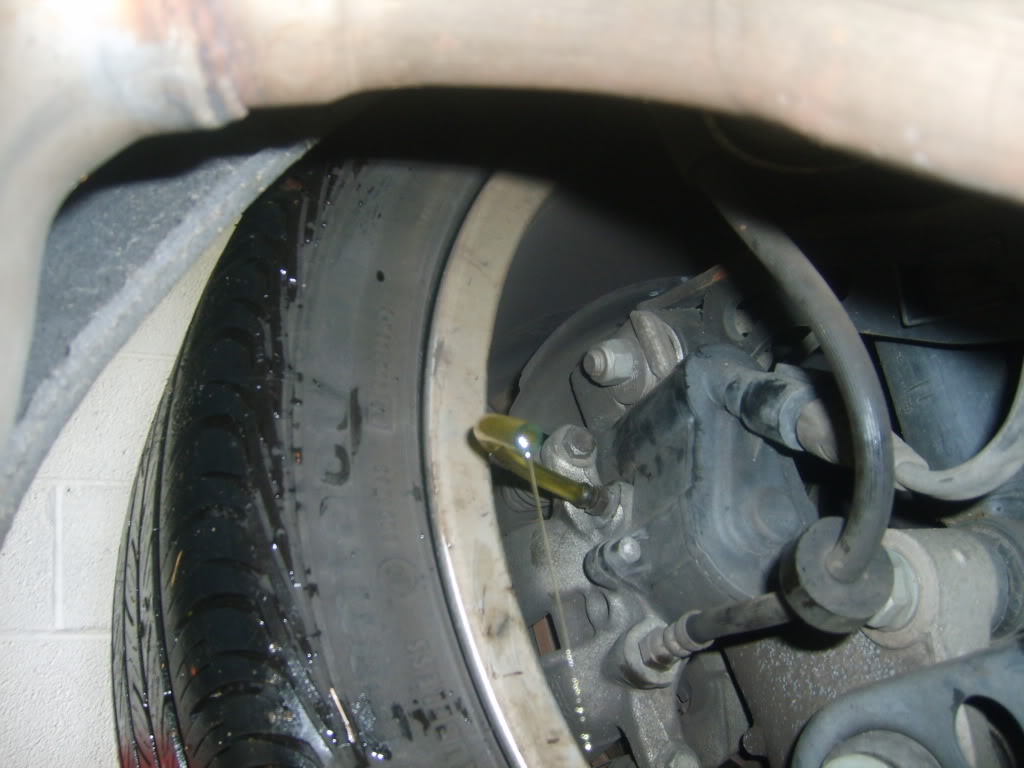
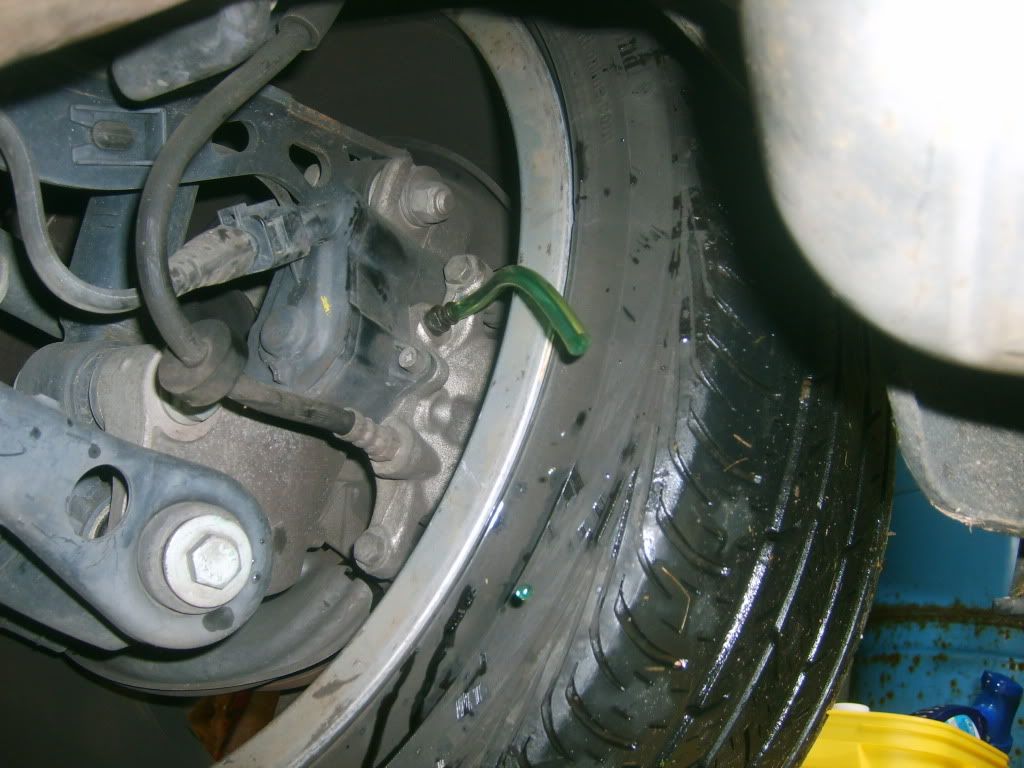
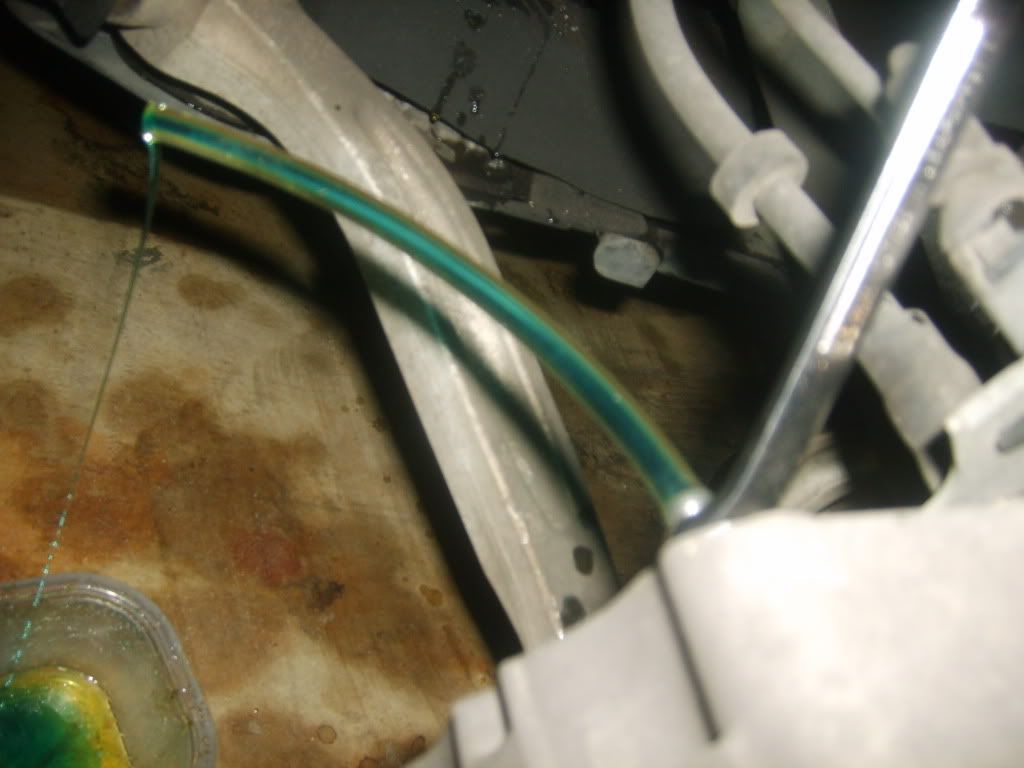
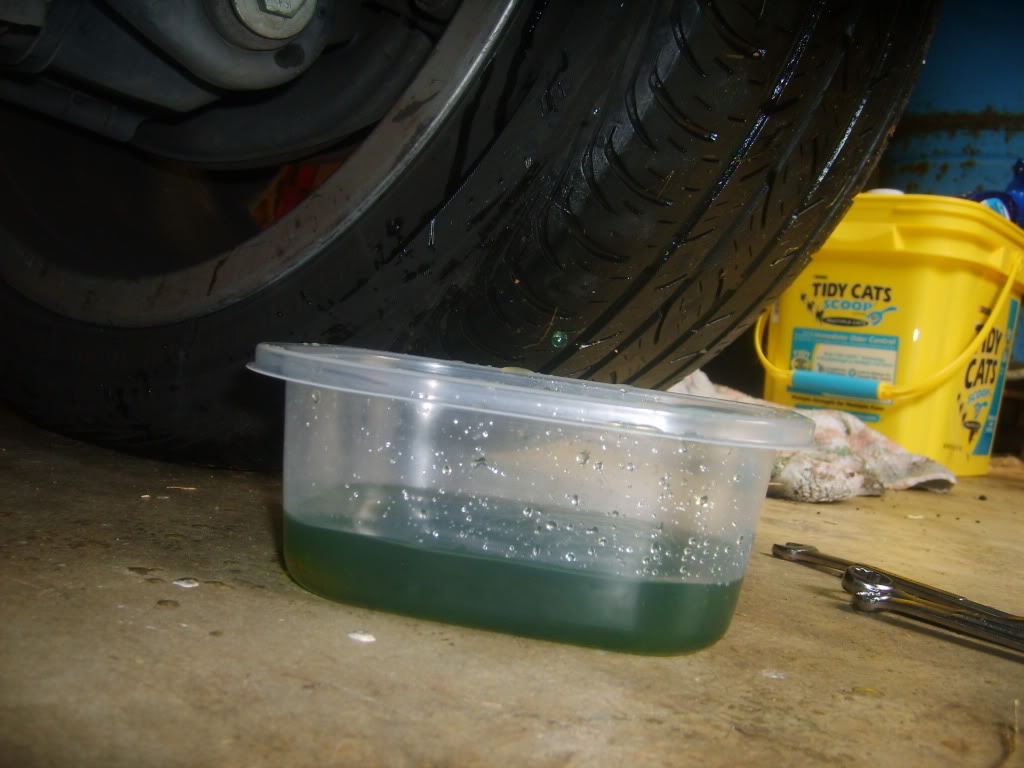
11) Repeat the process for the left rear, right front, left front, IN THIS ORDER. Next go to the front and jack up the car. No need to take the wheels off but you do have to jack the car. It gives you more room in the wheel well to just reach around the wheel and pull the nipple covers off, attach your wrench and tube and open the bleeder screw. The front will flush quickly so if you are not using fluid in the bleeder you don't have to worry about the reservoir running out of fluid. Just make sure you add fluid after each line.
12) Now that all of the fluid has been flushed you need to check the level in the reservoir and either add or remove fluid so that it falls in between the min / max levels.
14) Check brake pedal pressure (should feel the same or better), check for leaks and dispose of unused / old brake fluid properly,
15) Vaccum out any leaves before you put the black cover back on, clean up, test drive and you are done!!!
Instructions from ross-tech for bleeding your ABS pump if you accidentally allow the reservoir to go dry:
This procedure details how to bleed the ABS pump when replacing brake fluid. This procedure is NOT necessary unless your ABS pump has gone completely dry. For normal brake work including fluid replacement, hose replacement, pad replacement, etc. this procedure is NOT necessary
There are certain test conditions that must be met before doing this procedure:
Vehicle must on a lift or safe jack stands with no wheels touching the ground
Ignition should be in the "On" position
Procedure for Bleeding the ABS Brake Pump on VW Passat and Audi A4/S4, A6/S6, and A8/S8:
[Select] [03 - ABS Brakes] [Basic Settings - 04] Group 002 [Go!]
This will trigger the ABS pump to turn on for about 10 seconds. You should hear the fairly loud pump clicking during this time.
Click the [Done, Go Back] button and you're all set
So there are about 4 ways to do a brake fluid flush. These methods include gravity flushing/bleeding, pressure flushing/bleeding, vacuum flushing, brake pedal bleeding. I cover the pressure flush/bleed method as it’s the best overall way to do the flush for the DIY. However, if you don’t want to spend 50 bucks (trust me it’s worth it) on a pressure bleeder, then the gravity method is the safest, but most time consuming method as all you have to do is open all the bleeder nipples and let gravity drain the fluid out as long as the car is jacked up and that the bleed line and catch container are below the caliper (not recommended though). Also make sure that the reservoir NEVER runs empty. The other two methods, using the brake pedal (can damage the seals in the master cylinder if the brake pedal is depressed too far) and vacumming (requires expensive tools) are not recommended for the DIY.
So first things first, DO NOT LET THE BRAKE FLUID RESERVOIR GO EMPTY!!! I cannot stress this enough. If you do, then you have to use vag-com to bleed your ABS pump. I will post instructions at the end in the event this happens. If you don’t have vag-com then your car will have to be towed to your mechanic / dealer as the car will not be drivable. Also, be careful not to get any brake fluid on your paint, clothes, hands…as brake fluid will ruin just about anything it touches.
1) Throw on some rubber gloves, pop the hood and remove the black cover over the brake fluid reservoir by pulling off the rubber gasket that is holding it in place and the simply pullit off.

2) Next, pop the hood, rap some towels around the brake fluid reservoir, takeoff the brake reservoir cap. I popped out plastic screen for no reason as you don't have too. Again make sure brake fluid doesn't get on your paint.
3) Remove most of the brake fluid using a turkey baster, syringe, a baby snot sucker thing (I used one of my daughters, lol). DO NOT SUCK IT ALL OUT, leave some as you do not want air entering the system. Also, obviously DO NOT REUSE the turkey baster in the house. If you don't have one you can just bleed it out. Sucking it out just saves a little time.
4) Fill the reservoir with your new fluid and leave the cap off.
5) Attach your EMPTY pressure bleeder to the reservoir and pressurize to 10-15 psi. Check the pressure for about 30 seconds to make sure the pressure remains constant. If the pressure drops, then there is a leak somewhere. Tighten all connections and make sure the pressure remains constant.
6) Next depressurize the bleeder by removing the cap to the BLEEDER, not the cap connected to the reservoir. ALWAYS depressurize by opening the cap on the bleeder, not on the reservoir!
7) At this point you have the option of filling your pressure bleeder with brake fluid or leaving it empty and just using the pressure to push the fluid through (you should fill the bleeder thoough unless you want to make it harder on yourself). Placing 1 liter of fluid in the bleeder ensures that the reservoir will not run dry. Connect to the reservoir and pressurize to 10-15psi. Do not go over or you could bust some **** up.


8 ) Jack up the rear of the car if you want more space when getting under the car. I didn't bother to jack up the rear of the car. I just slid underneath the car. I really didn't even have to do this as you can work next to the wheel and reach behind the wheel and access the nipple. That's how I later did the fronts.


9) If you choose not to fill the bleeder (not recommeded) be sure to check and refill your reservoir at least once or twice when doing each of the rear lines. This ensures your reservoir does not run dry. Starting with the right rear of the car (if you are sitting in the driver seat), locate the bleed screw on the caliper.
10) Remove the nipple cover. Place your 11mm wrench on the screw. Connect your bleed tube, then loosen the screw. Again, for the rears, if u r opting not to put fluid in the bleeder, allow some of the old fluid to drain out (about 20 to 30 seconds) then close the nipple and add more fluid. If you are putting fluid in the pressure bleeder just allow it to drain until you see the new fluid being flushed. Again I used the blue fluid to see when all of the old fluid was flushed out. Without it, it will be difficult to determine when the new all of the old fluid is flushed out unless you know how much should be drained, Once I saw the blue fluid draining out, I continued to let it drain for an additional ten to twenty seconds to be sure all of the old fluid was out of the line.


11) Repeat the process for the left rear, right front, left front, IN THIS ORDER. Next go to the front and jack up the car. No need to take the wheels off but you do have to jack the car. It gives you more room in the wheel well to just reach around the wheel and pull the nipple covers off, attach your wrench and tube and open the bleeder screw. The front will flush quickly so if you are not using fluid in the bleeder you don't have to worry about the reservoir running out of fluid. Just make sure you add fluid after each line.
12) Now that all of the fluid has been flushed you need to check the level in the reservoir and either add or remove fluid so that it falls in between the min / max levels.
14) Check brake pedal pressure (should feel the same or better), check for leaks and dispose of unused / old brake fluid properly,
15) Vaccum out any leaves before you put the black cover back on, clean up, test drive and you are done!!!
Instructions from ross-tech for bleeding your ABS pump if you accidentally allow the reservoir to go dry:
This procedure details how to bleed the ABS pump when replacing brake fluid. This procedure is NOT necessary unless your ABS pump has gone completely dry. For normal brake work including fluid replacement, hose replacement, pad replacement, etc. this procedure is NOT necessary
There are certain test conditions that must be met before doing this procedure:
Vehicle must on a lift or safe jack stands with no wheels touching the ground
Ignition should be in the "On" position
Procedure for Bleeding the ABS Brake Pump on VW Passat and Audi A4/S4, A6/S6, and A8/S8:
[Select] [03 - ABS Brakes] [Basic Settings - 04] Group 002 [Go!]
This will trigger the ABS pump to turn on for about 10 seconds. You should hear the fairly loud pump clicking during this time.
Click the [Done, Go Back] button and you're all set


